“`html
Why Incomplete Stain Removal Ruins Your Refinish Job
Learning how to remove wood stain from bare wood before restaining—it’s gotten complicated with all the shortcuts and half-measures flying around. I made this mistake on a walnut dresser three years ago. Rushed the prep work, skipped the stripping, and ended up with blotchy, uneven color that looked like I’d applied stain with my eyes closed. That was a brutal lesson.
Residual stain creates three specific failure modes that will tank your project. First, old stain acts as a physical barrier. New stain can’t penetrate into the wood fibers the way it’s supposed to—instead, it sits on top of the existing layer like oil on water, creating a muddy, flat finish that never deepens properly. You’ll see this as patchy color variation across the surface, which honestly looks amateurish.
Second problem: incompatible finish layers. If the original stain was oil-based and you’re applying water-based over it, the new product simply won’t adhere. The wood’s grain is already sealed. Your new stain will bead up in some areas and disappear into others, leaving you with tiger-striped results that no amount of sanding fixes.
Third—and this is what caught me—old tannin residue from walnut or oak stain will interact chemically with new stain colors. You think you’re applying a medium brown. What you get is muddy purple or splotchy orange. The wood fibers are already saturated with color molecules, so adding more color doesn’t layer evenly. That’s the chemistry working against you.
Stripping isn’t optional. It’s foundational prep work. Period.
Chemical Stripper Method for Thick or Dark Stain
When the stain is dark, opaque, or has been sitting on the wood for years, chemical strippers are your fastest option. They beat sanding by hours.
Start with product selection. Gel strippers—Minwax Wood Finish Remover or Citristrip—cling to vertical surfaces without running. Liquid strippers penetrate faster but drip everywhere. For a dresser or cabinet, gel wins. For a tabletop, either works. Avoid those ancient caustic strippers if you can. They’re brutal on skin and the environment. Citrus-based or soy-based strippers cost more upfront ($18–$35 per quart) but won’t eat through your gloves or fume you out of the workshop. A standard dresser needs about 2 quarts.
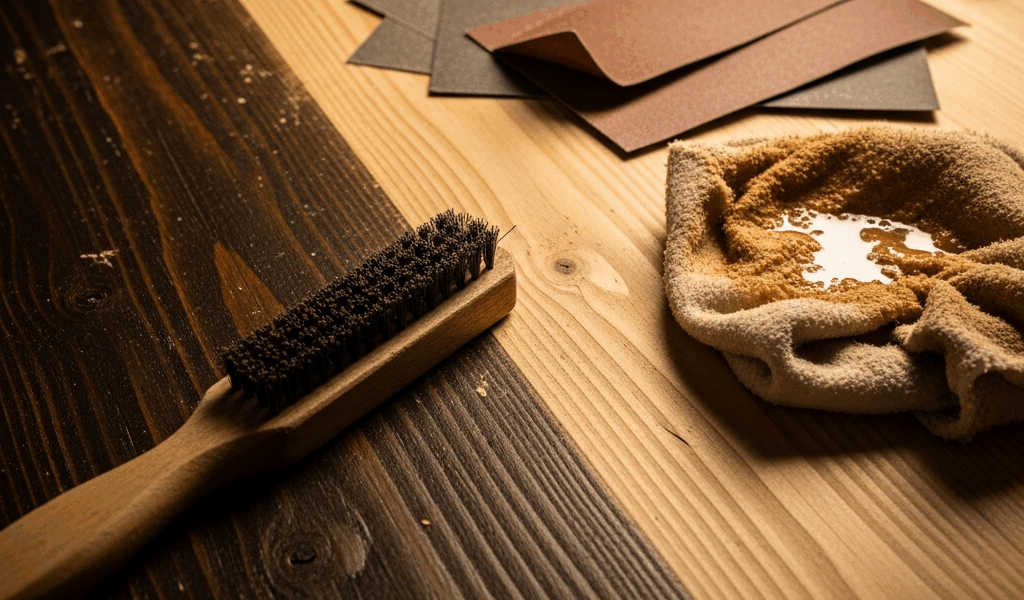
Here’s what you actually need: the stripper itself, a plastic scraper (not metal—metal gouges wood), a brass brush for stubborn spots, disposable gloves, eye protection, a respirator rated for organic vapors, newspaper or kraft paper, and old rags you don’t mind destroying. That’s it. Nothing fancy.
The technique matters more than the product. Apply the stripper generously with an old brush—thick enough that it looks wet and glossy. Don’t brush it back and forth like you’re staining. Paint it on and leave it alone. The chemical needs dwell time to break down the finish. Most gel strippers work best between 30 minutes and 2 hours. Check the label. Some aggressive products work in 15 minutes; gentler citrus ones might need 4 hours.
While you’re waiting, understand what’s happening. The stripper is dissolving the binder that holds the stain pigment to the wood. Once that bond breaks, the stain becomes a removable sludge instead of a permanent part of the surface.
When dwell time is up, scrape gently. The stain should lift in sheets if the stripper worked. If it’s still clinging, wait another 30 minutes. Scraping too early just spreads the mess around and wastes stripper. Use light, consistent pressure—you’re removing finish, not carving the wood.
Oil-based stains typically surrender to gel stripper within 2 hours. Water-based stains (like Varathane or Minwax Water-Based) are weird—they sometimes need longer dwell time because the stripper has to break through both the water-based binder and any polyurethane topcoat sitting on top. Lacquer stain is the easiest; it usually responds in 30 minutes.
Probably should have opened with this section, honestly—chemical stripping saves time when sanding would take forever. Seriously, we’re talking hours versus days.
After scraping, wipe the surface with old rags until the residue stops coming up. If the wood still feels tacky or looks glossy, repeat the stripper application. One coat rarely removes everything on stained wood. Two or three applications are normal.
For disposal: don’t pour stripper down the drain. Most hardware stores accept hazardous waste. Citristrip can technically go in the trash once it’s dried, but check your local regulations first. Ventilation is non-negotiable—open windows, run fans toward the exit, wear your respirator. I learned this the hard way when I got lightheaded stripping cabinets in a closed garage. Not worth it.
Sanding and Progressive Grit Strategy
After chemical stripping or if you’re starting with light stain, sanding removes what chemicals miss and levels the wood for fresh stain. It’s tedious but essential.
The grit sequence is 80 → 120 → 150 → 180 (minimum). Start with 80-grit only if the surface is rough or the chemical stripper left pitting. Most of the time, 120-grit is your starting point. Sand with the grain, not against it—against the grain leaves scratches that will be visible under stain like neon signs.
At 120-grit, you’re removing the last stain residue and flattening any raised grain the stripper caused. Sand until the dust is light brown or tan (matching the wood itself), not dark with pigment. Dark dust means stain is still there. Keep going until you see the right color dust.
Move to 150-grit. This smooths the scratches from 120. Sand until the wood feels almost silky and the dust is nearly white. At this point, you’re no longer removing stain—you’re preparing the surface to accept new stain evenly instead of in patches.
Final pass with 180-grit or higher. This is where grain preparation happens. The smoother the surface, the more even the new stain absorbs. Uneven sanding equals uneven stain absorption equals blotchy results. That’s not opinion; that’s physics.
Over-sanding is real, though. Sand too long at 180-grit and you start burnishing the wood fibers, closing the pores. Closed pores won’t accept stain properly. You’ll end up with shallow color and patchy absorption. Stop when the surface is smooth and uniform in appearance. You’re not going for mirror-polished; you’re preparing the wood to drink stain evenly.
Use a dust mask during sanding. A respirator if you have one. Saw dust irritates lungs and eyes. Wipe the entire piece with a tack cloth after sanding to remove all dust. This step is easy to skip and catastrophically bad if you do. Don’t skip it.
Oxalic Acid for Stubborn Stain and Wood Discoloration
Oxalic acid is a bleaching agent that dissolves tannin stains—the dark discoloration that won’t sand out on oak, walnut, or cherry. I use this on 40% of the stain removal jobs I encounter now because it solves problems that chemical strippers and sanding miss entirely.
The situation: you’ve stripped and sanded, but the wood still looks blotchy or darker in some areas. That’s tannin. The stain pigment is gone, but the wood’s natural color compounds are still saturated and uneven.
Oxalic acid (brands like Zinsser Driftwood or generic powdered versions at $8–$12 per pound) comes as a white powder. Mix it with hot water at a ratio of about 1 part acid to 4 parts water. Stir until dissolved. The solution will be slightly cloudy but clear enough to see through.
Apply it generously with a brush, working in sections. Let it sit for 10–15 minutes. The wood will lighten visibly as the acid works. Some woodworkers wait 30 minutes for stubborn stains, but watch for over-bleaching—the wood can become too pale and unnatural-looking if left too long.
Once the discoloration is gone, rinse thoroughly with clean water. Use a lot of water. Multiple rinses. Residual oxalic acid will interfere with stain absorption if you don’t rinse it completely. Let the wood dry fully—usually 12–24 hours depending on humidity and wood thickness.
How to tell if the wood is truly clean and ready: the surface should feel uniform to the touch, look even in color throughout, and show no residual stain or discoloration under bright light. Run your hand across it. If you feel a “sticky” sensation, oxalic residue is still present. Rinse again until that feeling disappears.
Once dry and confirmed clean, do a light 180-grit sand to remove any grain raise the water caused. The wood is now truly bare and receptive to even stain absorption.
Testing Your Clean Wood Before You Stain
This final step prevents the blotchy finishes that derail so many projects. It’s the insurance policy.
First: the water test. Dampen a small inconspicuous area (the underside of a tabletop, the back of a drawer) with distilled water. The wood grain will rise slightly, and you’ll see exactly how it will respond to water-based stain. If it looks uneven or grain-raise is excessive, do one more round of 180-grit sanding after the wood dries. If it looks uniform, you’re ready to move forward.
Second: the stain test. Apply your chosen stain to an edge or the back of the piece. Let it dry fully—usually 4–8 hours for oil-based, 2–4 for water-based. This isn’t a guess. You need actual data. The test will show you:
- Whether the color is what you expected
- Whether stain absorption is even across the wood
- Whether any blotching or streaking occurs
- How the grain looks when stained
If the test shows uneven absorption or blotchy color, don’t proceed to the whole piece. The wood isn’t ready. Go back, re-sand, or apply oxalic acid again. This feels like wasted time in the moment. It’s actually the difference between a professional finish and a project that makes you cringe every time you walk past it.
Once the test passes, you’re genuinely ready to stain. The wood is stripped, clean, open-grained, and uniform. The new stain will penetrate evenly, color will be consistent, and you’ll see the depth and richness that proper prep makes possible. That’s the entire reason you did this work—and why it matters.
“`


Stay in the loop
Get the latest fine finish wood working updates delivered to your inbox.