What Blotchy Stain Actually Looks Like and Why It Happens
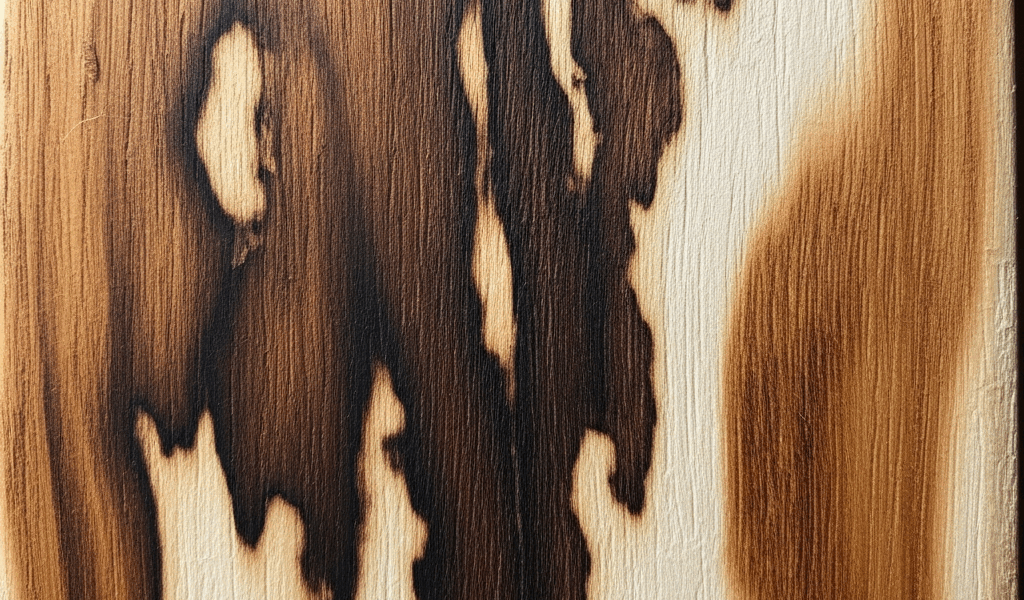
Wood finishing has gotten complicated with all the conflicting advice flying around. But blotchy stain is one of those problems that’s pretty hard to misidentify once you’ve seen it. Some areas drink up color fast and go dark. Others stay pale. The result looks muddy, diseased almost — dark islands floating across lighter sections when you hold the board up to raking light.
As someone who refinished a cherry nightstand with zero preparation, I learned everything there is to know about blotchy stain the painful way. Applied a walnut stain straight from the can, walked away for fifteen minutes, came back to something that looked like a skin condition. Today, I’ll share it all with you — what causes it, how to stop it before it starts, and how to fix it when you’re already past that point.
But what is blotchy stain, exactly? In essence, it’s uneven absorption — soft grain pulling in pigment faster and deeper than dense grain does. But it’s much more than that. Wood isn’t a uniform material. It contains vessels, rays, and growth rings with wildly different densities. The earlywood that grows in spring has larger pores and soaks up liquid stain like a paper towel. Latewood, forming in late summer, resists penetration. Same board, same stain, two completely different colors. That’s the whole problem in one sentence.
End grain complicates things further. Cut fiber ends are open and exposed — they drink stain several times faster than face grain. That’s why breadboard ends often look nearly black while the rest of the piece is a reasonable shade of medium brown.
The Wood Species Most Likely to Blotch on You
Not all woods behave the same under stain. Some species have such dramatic grain density variation that they’ve earned a reputation as problem children. That’s what makes working with them both frustrating and — honestly — kind of interesting once you know what you’re dealing with.
- Pine and other softwoods — Probably the number-one blotch offender. Construction-grade pine, reclaimed pine, whatever — the grain density swings wildly across every single board. Expect blotching unless you take precautions. Don’t make my mistake.
- Cherry — Beautiful wood. Genuinely frustrating to stain. The soft grain mixes with harder streaks that absorb at completely different rates, giving you a muddy, inconsistent finish if you don’t condition first.
- Alder — Low density, high blotch potential. Popular for cabinet doors because it’s affordable — around $3 to $5 per board foot at most hardwood dealers — but that affordability comes with stain absorption headaches.
- Birch — Especially plywood. The veneer face accepts stain unevenly, and the plies underneath can telegraph through if you’re not paying attention.
- Poplar — Inconsistent grain structure, inconsistent absorption. You’ll see splotching on nearly every board unless you prime the surface first.
Walnut, maple, ash — you’re in much better shape with those. Denser and more uniform, they accept stain far more predictably. Pine, cherry, and alder, though? You need an actual plan going in. So, without further ado, let’s dive in.
How to Prevent Blotching Before You Apply Any Stain
Probably should have opened with this section, honestly. Prevention beats fixes every single time — and the fix that actually works is pre-stain conditioner.
But what is pre-stain conditioner? In essence, it’s a thin, controlled sealant layer that partially closes the wood’s surface, slowing stain absorption enough that soft grain and dense grain end up taking on similar amounts of pigment. But it’s much more than just diluted polyurethane — it changes how the whole surface behaves.
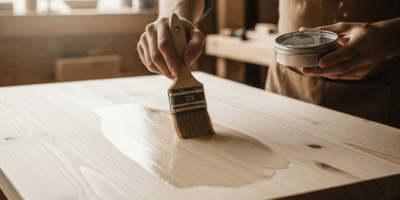
Here’s how to use it correctly. After your final sand — I use 150 or 180 grit — wipe the entire piece with a tack cloth. Open your pre-stain conditioner. I’m apparently a Minwax person, and their Pre-Stain Wood Conditioner works for me while other brands never quite deliver the same result. It runs about $6 to $8 per quart at Home Depot. Apply it with a brush or cloth in the direction of the grain. One thin coat. You’re sealing, not painting — don’t oversaturate.
Wait the full time listed on the can. Minwax specifies 15 minutes. Some people cut that short. They regret it. That waiting period is doing real work — at least if you want even absorption when you come back with the stain.
After conditioning, apply your stain exactly as the manufacturer recommends. You may need two coats instead of one to reach full color depth, but the color will be consistent rather than blotchy. Conditioner prevents roughly 90 percent of blotching problems before they happen.
Gel stain might be the best option for particularly stubborn species like pine, as staining those woods requires real control over absorption rate. That is because gel stain sits thicker on the surface — it doesn’t penetrate as aggressively as liquid stain, giving soft grain and dense grain time to equalize. Slower to apply, slower to dry. Worth it. Minwax Gel Stain runs about $10 a can and handles pine beautifully.
How to Fix Blotchy Stain That Is Already Dry
If you’re here because your project already looks blotchy and the stain is dry — welcome. That was me, standing in my garage at 10pm staring at that cherry nightstand. You have real options. Neither is quick, but both work.
Option one: Start over, but smarter. Sand the piece back to bare wood — 120-grit first, then 150-grit. This removes the blotchy stain completely. Wipe clean with a tack cloth. Apply pre-stain conditioner, wait the full 15 minutes, restain. Yes, this is extra work. I’ve done this twice on two separate projects, and the second attempt always looks professional. Always.
Option two: Go darker. If the blotching is mild — light patches mixed with medium patches — apply a second coat of stain, one or two shades darker than your original color. The second coat fills lighter areas and evens out tone somewhat. This won’t erase severe blotching. But for minor variation on a drawer side or interior surface, it might be good enough. One warning: you can’t lighten it afterward without stripping down to bare wood.
Option three for finished pieces: Glaze. If the piece is already sealed under poly or lacquer and sanding back isn’t realistic, a glaze layer can even out visible tone variation. Apply in thin coats until the color reads consistently. Cosmetic — it won’t fix blotching under bare stain — but useful once you’re working over a topcoat.
Be honest with yourself about what’s salvageable. Severe blotching on a tabletop or visible face panel usually means sanding back to bare wood. Minor blotching on a hidden surface? A darker second coat is probably good enough.
Quick Reference — Blotch Cause and Fix at a Glance
| Cause | Fix |
| Skipped conditioner on pine or cherry | Sand to 180 grit, apply pre-stain conditioner, wait 15 minutes, restain |
| Stained end grain darker than face grain | Apply conditioner to end grain, sand face and edges to 180, restain with brush control |
| Blotching already dry on finished piece | Apply glaze to even tone, or sand back to bare wood and restart with conditioner |
| Mild blotching on hidden surfaces | Apply second coat of stain one shade darker |
| Working with problem wood (alder, poplar) | Use gel stain instead of liquid, or apply two coats of conditioner before staining |


Stay in the loop
Get the latest fine finish wood working updates delivered to your inbox.