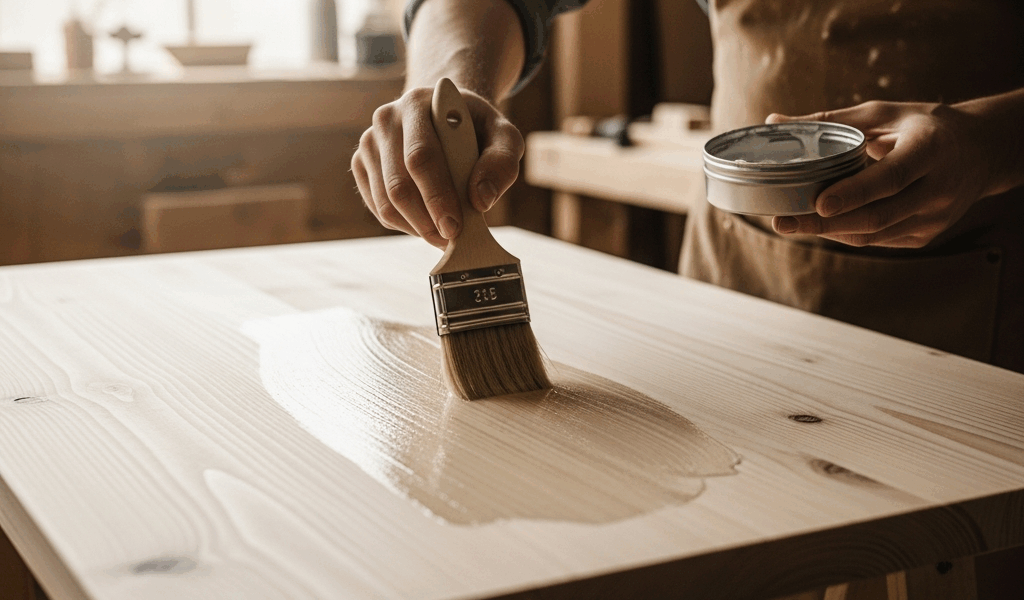
How to Finish Pine Furniture Without Blotching
Why Pine Blotches — And Why It’s Not Your Fault
Pine finishing has changed quite a bit thanks to the conflicting advice flying around. As someone who spent years refinishing furniture in a cramped garage with bad lighting and a stubbornness problem, I picked up the practical knowledge of why pine behaves the way it does. And the first thing I’ll tell you is this: if you’ve ended up with dark, splotchy patches after staining, you didn’t mess up the application. I thought I was making mistakes for years. Wrong brush, wrong brand, too much product, too little. I switched everything except my understanding of the actual wood.
Pine is a softwood — and its growth structure alternates between two completely different types of fiber. Earlywood, the lighter bands, grows fast and stays porous. Latewood, the darker tight-grained bands, is dense and barely absorbs anything. So when you drag a penetrating stain across the surface, those soft earlywood sections drink it in like a sponge while the latewood just sits there looking smug. The result is that harsh, splotchy contrast — and it has nothing to do with your technique.
But what is blotching, really? In essence, it’s uneven pigment absorption caused by cellular structure. But it’s much more than that — it’s the tree’s entire growth history showing up uninvited on your furniture. That’s what makes pine endearing to us woodworkers, honestly. Once you understand it, the fix becomes obvious: control how the stain penetrates, switch to a different stain type, or skip stain altogether. Three paths. Everything else is noise.
Solution 1 — Pre-Conditioner (Reduces Blotching, Does Not Eliminate It)
The standard forum advice is to use a pre-stain wood conditioner. That advice is correct. It’s also incomplete — and that gap is exactly where most people run into trouble.
Minwax Pre-Stain Wood Conditioner runs about $12 to $15 for a quart at most hardware stores. Varathane makes something similar. Both work on the same idea: the conditioner partially fills those thirsty earlywood cells before the stain arrives, so absorption gets leveled out across the surface. It works. Sort of.
Here’s the honest reality — pre-conditioner knocks blotching back by maybe 50 to 70 percent. Not 100. You will still see variation. If you’re chasing perfectly even, mirror-flat color, you’ll be disappointed. If you want to take the edge off that harsh contrast while still showing off pine’s natural grain — this is a solid choice. Just don’t go in expecting miracles from a $13 quart.
Application matters more than most people think. Brush it on generously — don’t be stingy. Wipe off the excess with a clean cotton cloth. Then stain within 15 to 30 minutes, while the conditioner is still slightly tacky. Don’t let it dry out completely. I made this mistake on a pine dresser I was refinishing a few years back — got distracted by something on TV, walked away for two hours, came back and the conditioner had dried completely flat. The stain blotched almost as badly as if I’d skipped the conditioner step entirely. Don’t repeat what I did.
Pre-conditioner makes sense when you specifically want a stained look that still reads as pine. It’s not the right call when you need guaranteed, uniform color on a display piece or something that’ll live under bright showroom lighting.
Solution 2 — Gel Stain (Most Control Over Color, No Blotching)
Frustrated by the limitations of liquid penetrating stains and a growing pile of blotchy failed projects, I started using gel stain on pine a few years ago and haven’t looked back for certain applications. Gel stain is a fundamentally different product. It doesn’t penetrate. It sits on the surface, coloring from the top down rather than soaking in — which means it simply doesn’t care whether it’s touching earlywood or latewood.
General Finishes Gel Stain is what most professional finishers reach for. Available in quarts around $20 to $25. Java, Antique Walnut, and Espresso are the popular choices on pine — all three look genuinely good. Because the formula stays on the surface rather than absorbing in, it colors both wood types equally. No blotching. Full stop.
The trade-off is real, though. Gel stain produces a heavier, slightly more opaque appearance than penetrating stain. You get color, you get grain — but you don’t get that deep, saturated grain-pop effect you’d see with a penetrating stain on an open-grain hardwood. On pine specifically, most people genuinely cannot tell the difference once a topcoat goes on. But if grain pop matters to you, that’s worth knowing up front.
Application is different from liquid stain. Apply it generously with a foam brush or a lint-free cloth. Work it into the surface — don’t rush. Let it sit several minutes until it gets tacky. Not wet, not dry — tacky. Then wipe off the excess in the direction of the grain using clean rags. For a second coat, let the first one cure at least four hours and repeat the whole process. Two coats of General Finishes Gel Stain in Java over sanded pine produces a rich, even, dark finish with zero blotching risk. This is what I use now when a client wants stained pine furniture that has to look flawless in a finished room.
Solution 3 — Skip the Stain and Use a Shellac Seal Coat
Worth flagging before going further. For natural pine — the warm, honey-toned look without added stain color — the shellac seal coat approach is what professionals have been using for decades. And it’s almost completely absent from consumer finishing guides, which is a genuine shame.
Here’s the problem it solves. Even when you skip stain entirely and go straight to polyurethane, pine still misbehaves. The first coat absorbs differently across earlywood and latewood — looks dull in spots, shiny in others. You add more coats. The build gets uneven. It never quite looks right, and you can’t figure out why. I spent three weekends on a set of pine bookshelves chasing that problem before someone finally told me about shellac.
A single seal coat of shellac fixes this entirely. Shellac seals porous wood fibers fast, evenly, and plays well with virtually every topcoat you’d put over it. The product to use is Zinsser Bulls Eye Shellac — the orange/amber formula specifically, which adds a warm tone that suits pine beautifully. Cut it to a 1-pound cut by diluting it 50/50 with denatured alcohol in a clean glass jar. Apply one thin coat with a good natural-bristle brush. Let it dry — shellac dries in roughly 30 to 45 minutes at normal room temperature. Sand lightly with 320-grit. That’s it.
Humbled by years of fighting pine’s porosity with conditioners and extra coats of finish, I switched to this sequence on a farmhouse dining table build and the difference was immediately obvious — even absorption, consistent sheen across the whole surface, beautiful natural pine color without any of the fighting. That table is still in someone’s kitchen looking great.
Clear Finish for Pine — The Complete Sequence
If you want the best possible natural pine finish — durable, even, professional-quality — here is the complete sequence from bare wood to final coat.
- Sand to 220-grit. Go with the grain on your final pass. Pull all the dust with a tack cloth or a vacuum followed by a clean brush. Don’t skip grits and expect the seal coat to hide it — it won’t.
- Apply one coat of Zinsser Bulls Eye Shellac at a 1-pound cut — that’s a 50/50 dilution with denatured alcohol. Brush it on thin and even. Let it dry fully, about 45 minutes to an hour at room temperature.
- Sand lightly with 320-grit. You’re knocking down grain raise, not removing the shellac coat. Wipe clean with a dry cloth.
- Apply two to three coats of oil-based polyurethane. Minwax Helmsman works well. General Finishes Arm-R-Seal works better — satin finish specifically. It levels smoothly, doesn’t look plastic, and goes on without a fight. Brush on thin coats rather than thick ones.
- Sand lightly with 320-grit between each polyurethane coat after it’s fully dried — typically 24 hours for oil-based. Leave the final coat alone.
Three coats of Arm-R-Seal over a shellac seal coat on sanded pine produces a finish that is hard, even, and genuinely good-looking. Faster than fighting blotching with conditioners, more consistent than any number of extra poly coats — this is what professional furniture makers use on natural pine. There’s no secret formula. Just an understanding of why the problem exists and the right sequence to sidestep it entirely.
Whether you go with pre-conditioner for a stained look, gel stain for guaranteed even color, or the shellac-and-poly sequence for natural pine — all three approaches start from the same place. Accepting that pine’s porosity is structural, not a problem you can scrub or wipe away. Work with the wood, not against it, and the finish takes care of itself.


Stay in the loop
Get the latest fine finish wood working updates delivered to your inbox.