Tung Oil vs Danish Oil — Which Finish Belongs on Your Project
Tung oil vs Danish oil has turned into a moving target with all the contradictory advice flying around — half of it from people who’ve never actually finished a real piece of furniture. I’ve stood in the finishing aisle at Woodcraft holding both cans, reading the back labels like one of them was about to say something honest. They never did. So I started testing both on actual projects — a hard maple cutting board, a walnut jewelry box, a dining table my kids eat breakfast on every morning — and the answer turned out to be simpler than the marketing copy makes it sound. The wrong choice isn’t catastrophic. But the right choice saves you time, protects your work better, and leaves you feeling like you actually know what you’re doing.
This article includes affiliate links. We may earn a commission at no extra cost to you.
The Core Difference in 30 Seconds
But what is tung oil, exactly? In essence, it’s oil pressed from the nut of the tung tree — nothing else. But it’s much more than that. No additives, no resins, no varnish blended in to speed things up. It cures through oxidation, dries slow, and leaves a matte, dead-flat finish that lets the wood look the way wood actually looks. It’s been used for thousands of years and doesn’t care that it’s not trendy.
Danish oil is a blend. Typically linseed oil or tung oil combined with a varnish resin and mineral spirits as a carrier. Different brands mix it differently — Watco Danish Oil, the one you’ll find at most big-box stores for around $18–$22 a quart, leans heavier on the varnish side. That varnish content is what gives Danish oil its satin sheen and faster dry time. It’s also what makes it slightly film-forming, which matters enormously depending on what you’re building.
Quick callout up front. Most of the confusion between these two finishes comes from people treating them as interchangeable when they’re actually solving different problems.
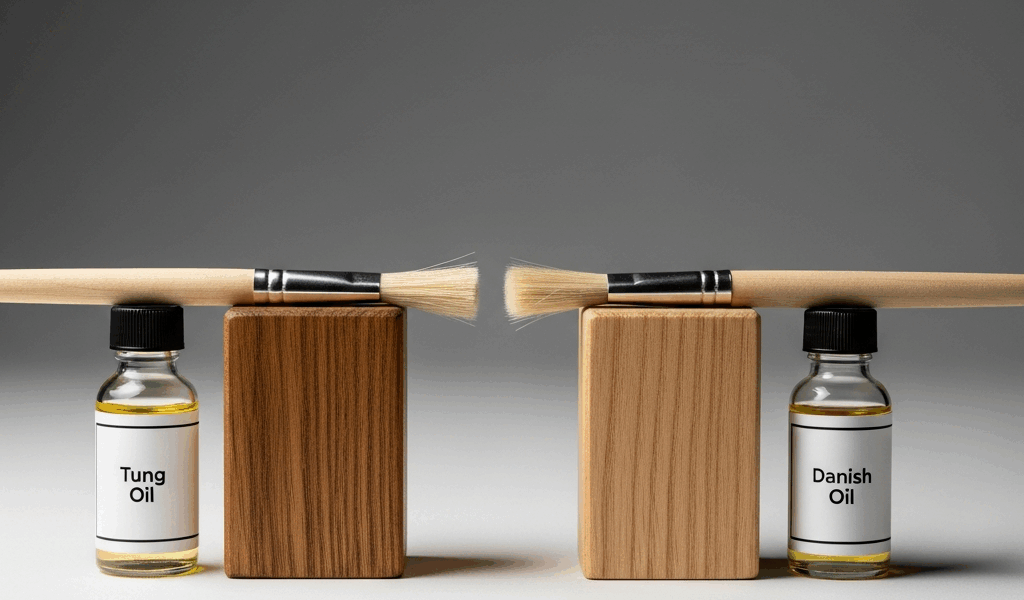
- Tung oil — 100% natural, deeply penetrating, matte finish, slow curing (24–48 hours between coats), food-safe once fully cured
- Danish oil — oil-varnish hybrid, satin sheen, faster dry time (4–6 hours in good conditions), builds a very thin protective film on the surface
One more thing worth knowing: a lot of products labeled “tung oil finish” are not pure tung oil. Real pure tung oil is sold by brands like Hope’s 100% Pure Tung Oil or Tried and True Original. If the label says “tung oil finish” without the word “pure,” you’re probably holding a Danish oil variant in disguise. Read the ingredient list. If you see naphtha or mineral spirits listed — it’s a blend.
When to Use Tung Oil
There are three situations where I reach for pure tung oil without hesitation.
First — anything that touches food. Tung oil is non-toxic once fully cured, making it one of the few natural wood finishes that holds up on cutting boards and wooden utensils. The curing process drives out the solvents completely, and what remains is a polymerized oil the FDA considers food-safe. Danish oil, with its varnish content and chemical dryers, is not something I’d want on a surface where I’m slicing vegetables for my family’s dinner. Side-step the error I made — I used Danish oil on a cutting board early on and spent twenty minutes researching whether I’d poisoned everyone at the table.
Second — when you want the wood to look like wood. Tung oil enhances grain without adding sheen or surface build. Got a piece of figured walnut? A jewelry box from quilted maple? Tung oil saturates the grain and disappears into the wood rather than sitting on top of it. No plastic-looking topcoat getting in the way of something genuinely beautiful.
Third — when you’re not in a rush. This matters more than people expect. Tung oil requires patience — three to five coats minimum, a full 24 hours between each coat, light sanding with 400-grit between coats two and three. Start on Wednesday night and you might not be handling it without gloves until Sunday. That’s the deal. If your timeline allows it, fine. If you’re trying to get something to a gift recipient by Saturday afternoon, tung oil will let you down.
Projects That Belong With Tung Oil
- Cutting boards and butcher blocks
- Wooden bowls and salad servers
- Jewelry boxes and display cases where finish clarity matters
- Heirloom pieces where longevity and repairability are priorities
- Any raw wood interior where you want a completely matte, natural look
When to Use Danish Oil
Danish oil is the finish I grab when I’m making furniture that needs to function in a real household — something people will set drinks near, drag across a floor occasionally, or subject to the general chaos of daily use. The varnish component creates a very thin but real protective layer that pure tung oil doesn’t build. It’s not as durable as a full coat of polyurethane or lacquer, but it’s meaningfully tougher than pure oil. That’s what makes Danish oil endearing to us weekend woodworkers — it punches above its weight without demanding much from you in return.
The other thing Danish oil has going for it — it’s fast. Genuinely fast. In a well-ventilated shop at around 65–70°F, I’ve gotten a three-coat Danish oil finish done in a single day. Flood it on, let it soak for 15 minutes, wipe off the excess, wait a few hours, repeat. That kind of turnaround isn’t possible with pure tung oil. On a weekend project where you want to bring something inside by Sunday evening, Danish oil wins by a mile.
The satin sheen is also worth mentioning as a feature, not just a characteristic. On dining tables, bookshelves, side tables — pieces living in a finished interior space — a little sheen looks intentional. It communicates that the piece was finished properly. The matte look of tung oil is beautiful in the right context, but on a dining room table it can sometimes read as unfinished to people who don’t know woodworking. Apparently that matters more to dinner guests than I used to think.
Projects That Belong With Danish Oil
- Dining tables and coffee tables with moderate daily use
- Bookshelves and storage pieces
- Interior furniture where you want some protection and a completed look
- Workshop projects that need to be done this weekend
- Pieces where you’ll do light maintenance refinishing every couple of years
Project-by-Project Guide
Here’s where it gets concrete. Four projects people ask me about constantly — with a direct answer for each one.
Cutting Board — Use Tung Oil
This isn’t close. Pure tung oil — Hope’s 100% Pure Tung Oil runs about $24 for a pint at most woodworking retailers — is the right call. It’s food-safe once cured, it doesn’t build a surface film that will eventually crack and flake off around knife cuts, and refreshing it is straightforward: wipe on a new coat every six months, sand lightly with 320-grit if needed, done. I made a hard maple cutting board years ago for my kitchen, finished it with five thin coats of pure tung oil, and it’s been in weekly use since. Danish oil on a cutting board is a mistake I’ve seen recommended online — it’s wrong. The varnish content makes it inappropriate for food contact and the thin film it builds will fail under knife work anyway.
Coffee Table or Dining Table — Use Danish Oil
Furniture that gets daily contact from hands, cups, elbows, and the occasional homework assignment needs more protection than pure oil can reliably give. Watco Danish Oil in Natural is my standard here — three coats over a day and a half, final coat rubbed out with 0000 steel wool for a smooth, even satin finish. It won’t protect like a catalyzed lacquer or two-part epoxy, but for a piece in a family room it handles the load well. Recoat every two to three years and it stays looking good without a major refinishing project.
Outdoor Bench — Use Neither
Stopped by this question more than once from readers, and the answer surprises people. Neither tung oil nor Danish oil is a real outdoor finish. Both break down under UV exposure and repeated wetting — you’ll be recoating constantly just to keep up with the degradation. For an outdoor bench or any exterior furniture, reach for a marine-grade spar urethane like TotalBoat Gleam or Minwax Helmsman. They’re formulated for the actual problem: UV, moisture, expansion and contraction through seasons. Using a penetrating oil on outdoor furniture is a maintenance trap — one most people fall into exactly once.
Jewelry Box — Use Tung Oil
Frustrated by a jewelry box that looked cheap despite expensive materials, I finally switched from Danish oil to pure tung — and the difference was immediate. A jewelry box is a detail piece. People look at it closely, touch it, open and close it hundreds of times. The figured wood that typically goes into a jewelry box — burl, curly maple, bookmatched walnut — deserves a finish that shows it off. Tung oil applied in four or five careful coats, with the final two buffed out with 0000 steel wool and paste wax, gives you a depth and warmth that Danish oil can’t touch. The extra days of drying time are completely worth it on a piece like this.
Application Tips for Each
Applying Tung Oil Correctly
Thin coats are everything with tung oil. Thick coats don’t dry — they stay tacky for days and trap dust. I apply with a lint-free cotton rag, using just enough to wet the surface, and let each coat soak in for 30 minutes before wiping off any excess that hasn’t penetrated. Then I wait. A full 24 hours between coats in a warm shop, 48 hours if the temperature drops below 60°F. Between coats two and three, sand lightly with 400-grit dry paper, wipe off the dust with a clean tack cloth, then continue. Three coats minimum — five coats for anything that will see real use.
Spare yourself the wrong turn I took: skipping the final wipe-off step. Leaving too much tung oil sitting on the surface creates a sticky, uneven finish that takes forever to fix. Wipe it off while it’s still wet, every single coat — no exceptions.
Applying Danish Oil Correctly
Danish oil works differently. The technique is flood-and-wipe, not thin-and-wait. Apply a generous wet coat with a foam brush or cloth, let it sit on the surface for 10–15 minutes while it soaks in, then wipe off everything remaining on the surface. Any puddles or thick spots left to dry will get tacky and gummy — work in sections on large pieces so you’re not chasing a drying front across a 72-inch tabletop.
Wait four to six hours between coats. Three coats is typically sufficient for interior furniture. After the final coat has dried overnight, go over the whole surface with 0000 steel wool using light, even pressure, then wipe clean. That step knocks down any dust nibs and gives you a surface that feels smooth and finished rather than just oiled.
While you won’t need a full fire suppression system, you will need a metal container of water nearby when using Danish oil — drop your rags in it when you’re done. Oil-soaked rags can spontaneously combust as they dry. This isn’t a theoretical risk — it’s happened in real shops, and it’s easily prevented by keeping the rags submerged in water until you can dispose of them properly.
Between these two finishes, there’s a right answer for almost every project. Reach for the tung oil when food contact or natural beauty is the priority. Reach for the Danish oil when protection, speed, and satin sheen make more sense. And for anything going outside — put both cans back on the shelf and find a real exterior finish.


Stay in the loop
Get the latest fine finish wood working updates delivered to your inbox.