
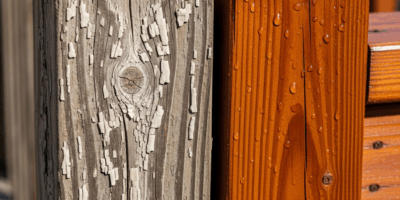
Why Pine Blotches in the First Place
Pine has gotten a bad reputation with woodworkers, and honestly, most of that reputation is deserved. The grain structure is all over the place — dense patches sitting right next to areas soft and porous as a kitchen sponge. Stain hits the surface and just… disappears into the soft spots while barely grazing the dense ones. What you get are those dark, splotchy patches staring back at you, usually right when you thought you were done. That’s pine being pine. It’s not you. Understanding that upfront actually helps you stop blaming yourself and start fixing the thing.
Check This Before You Do Anything Else
Before you grab sandpaper or a can of stripper, ask yourself four quick questions. Is the stain still wet? If you can still smell the mineral spirits or the surface feels tacky, you have options. How bad is the blotching? A few dark streaks is a completely different problem than a surface that looks like a tie-dye shirt. Did you use pre-stain wood conditioner? If the answer is no, that explains everything. Did you wipe the excess stain off promptly, or did you walk away and let it soak? Your answers here determine which recovery path actually makes sense.
I learned this the hard way on a pine dresser — a beat-up secondhand piece I paid $40 for at an estate sale about five years back. I panicked and started sanding before the stain had even fully dried. By the time I realized it was still workable, I’d already torn up the soft grain. Skip the misstep I made. Take thirty seconds and work through those questions first. It’ll save you hours of backtracking.
If the Stain Is Still Wet — Act Now
You’ve got a window. Maybe thirty minutes, maybe forty, depending on stain type and how warm the room is. Use it.
The most aggressive move is grabbing a clean, lint-free cotton rag — cotton works better than paper towels, I’m apparently just a cotton rag person and paper towels never pull stain evenly for me — and wiping the entire surface hard, following the grain. Not gentle feathering strokes. Real pressure. You’re pulling stain out of the soft pores and spreading it across the whole surface. Work in sections about 12 inches wide and move before each section dries. The goal is evening out absorption before the stain cures and the window closes.
If wiping alone isn’t cutting it, mineral spirits is your second weapon. A small pour onto a rag, worked into the dark spots while moving with the grain. Mineral spirits can re-dissolve fresh stain and help it shift around. Honestly, this is a Hail Mary. Sometimes it works beautifully. Sometimes it deepens the blotching or creates entirely new problems — oversaturate and you’re just pushing wet stain around, potentially making new dark patches somewhere else. Light touch. Grain direction only. Stop earlier than you think you need to.
One more option if the blotching is mild: flood the whole surface with additional stain while wiping as you go. Sounds backwards. It works because you’re laying fresh color uniformly across both soft and dense grain, masking earlier blotches under a more consistent tone. You’ll end up darker overall — only go this route if darker actually works for you.
If the Stain Has Dried — Your Recovery Options
Quick note before the rest of this. Most people reading this are already staring at a dried, blotchy disaster and don’t have the luxury of the wet-stain window. There are three paths forward, and they’re not equally painful.
Path One — Gel Stain Over Top
This is the fastest fix for mild to moderate blotching. Gel stain is thick — almost paste-like — and sits on top of the wood rather than soaking in. That means it lays color down uniformly regardless of what chaos happened underneath. One coat over your dried, blotchy liquid stain will visually mask most uneven absorption.
Minwax Gel Stain and Varathane Gel Stain are the workhorses here. Around $8 to $12 per pint at most hardware stores. Apply with a foam brush following the grain, wipe excess after 5 to 10 minutes. The gel naturally tints the lighter areas more than the already-dark spots, evening things out without much effort on your part. Let it cure for 24 hours before topcoating — but you’ve recovered the project without major disruption. That’s the win.
The catch: your final color shifts darker and richer than the original liquid stain. If you had a very specific shade in mind, this changes it. If you can live with darker, this whole fix takes about three hours and the problem disappears.
Path Two — Toner or Glaze Between Topcoats
Subtler approach. Let the blotchy stain dry completely, then apply your first coat of polyurethane over it. Once that cures, mix a toner — roughly 1 part stain to 5 parts thinner — and brush a thin coat across the entire surface. Color gets added uniformly without soaking in the way liquid stain did. Sand lightly with 220-grit between coats, then topcoat normally.
It takes longer than the gel stain route and requires a steadier hand. But the color control is genuinely finer. You build tint gradually, adjusting as you go, until the blotching disappears under consistent tone.
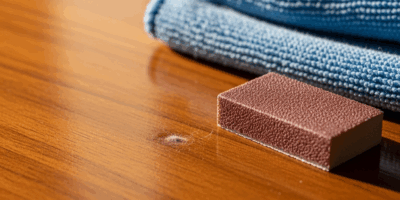
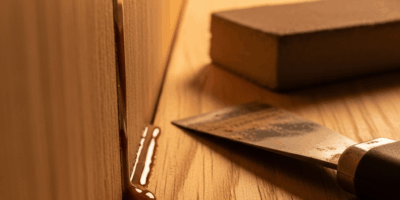
Path Three — Sand Back to Bare Wood and Start Over
Sometimes this is just the right call. Severe blotching — dark splotches dominating the whole surface — or a finish that feels wrong beyond just the color? Stripping back to bare wood and restarting with proper technique is honest work. It’s not failure. It’s the correct answer.
Use 120-grit to pull the stain and old finish off, then stop at 120-grit. That part matters. Pine’s soft grain gets torn and fuzzy when you go finer than 120 before staining — it’ll look worse than the original blotching did. Once you’re back to bare wood, apply Minwax Pre-Stain Wood Conditioner (about $7 per quart) liberally, let it dry per the label instructions, then apply fresh stain and wipe excess within 5 minutes. No letting it sit. No walking away.
This path takes a full day. It’s frustrating. It works. You’ll end up with a properly finished surface and a clear picture of exactly what went wrong the first time.
How to Avoid This on Your Next Pine Project
Pine blotching has changed quite a bit thanks to the conflicting advice flying around online. So let’s cut through it.
Pre-stain wood conditioner is not optional on pine. It’s mandatory — at least if you want even color. Minwax or Varathane conditioner, applied per instructions and dried completely, opens pine’s pores uniformly so stain absorbs consistently. This one step eliminates most blotching before it ever starts. Cost is minimal. Time cost is fifteen minutes.
Gel stain as your default on pine instead of liquid stain might be the best option, as pine requires that kind of surface-level color control. That is because liquid stain just follows pine’s chaotic grain wherever it wants to go, while gel stain doesn’t give it the chance. Slightly thicker to apply, dramatically more consistent results. Once you’ve done a pine project with gel stain, going back to liquid feels unnecessary.
Test on scrap first. Find a piece of pine from the same board — or as close as possible — apply conditioner, let it dry, apply stain, and wipe per your plan. You’ll see exactly how your chosen stain behaves on that specific wood before you commit to the actual project. This new habit takes thirty minutes and prevents the whole blotchy situation from happening in the first place.
Pine is tricky. It’s also surprisingly forgiving when it comes to fixing mistakes. Now you know what to do when blotching happens. It’s not the end of the project.

Stay in the loop
Get the latest fine finish wood working updates delivered to your inbox.