“`html
How to Fix Wood Stain That Looks Patchy and Uneven
I’ve stared at enough wooden surfaces to know that patchy stain feels personal. You’ve spent hours prepping, applied what seemed like a reasonable coat, and now you’re looking at a finish that resembles a topographic map instead of the rich, uniform color you imagined. Here’s the thing though — most people immediately grab sandpaper and start over. Don’t make my mistake. Knowing why the stain looks patchy matters infinitely more than diving straight into fixes.
This article walks you through diagnosing your specific patchiness problem before you touch anything, then shows you four actual repair methods that often work without full resanding.
What Causes Patchy Stain in the First Place
Patchy stain happens for exactly four reasons. Which one created your problem changes everything about how you fix it.
Poor Surface Preparation
This is the biggest culprit — wood surfaces trap dust, oils, and debris that block stain from absorbing evenly. I once sanded a tabletop with 120-grit sandpaper (too coarse) and skipped the dust vacuum step entirely. The stain clung to low spots and beaded off raised surfaces, creating a mottled appearance that looked deliberate but absolutely wasn’t.
Sanding grit matters specifically. Anything coarser than 150-grit leaves scratches deep enough that stain pools in them. Finer grits — 180 to 220 — create a more uniform surface for absorption. But here’s what catches people: even after sanding with the right grit, the dust itself causes problems. Wood dust acts like a barrier. I now use a tack cloth (cheap, about $3 at any hardware store) after vacuuming, and the difference is genuinely noticeable.
Stain Formulation Issues
Not all stains behave the same way. Oil-based stains and water-based stains work differently, and within those categories, viscosity varies wildly.
Pigment settling is real. If your stain can has been sitting for weeks, pigments drop to the bottom. You stir, sure, but incomplete stirring leaves the bottom thick with pigment and the top thin. That’s patchy stain waiting to happen. I’ve seen people paint with the thin stuff, notice it looks weak, then switch midway to the thick stuff from the bottom — instant patchiness.
Gel stains are thicker on purpose. That thickness means they don’t flow as readily, and they’re easy to apply unevenly. Water-based stains dry faster, which creates edge marks if you don’t maintain a wet edge while applying.
Application Speed Problems
Rushing is underrated as a culprit. When you apply stain too quickly or inconsistently, some areas absorb more than others. The wood is still drinking the stain at different rates depending on grain density, but your speed determines how long each section sits wet.
I once stained a pine shelf in about four minutes. Bad decision. The first section absorbed stain for a full minute before I returned to it, while the last section got maybe 20 seconds. Result? A gradient from dark to light across one edge.
Wood Species Variation
Softwoods like pine and fir are notorious for patchy stain. They contain areas of dense grain and soft grain that absorb stain at wildly different rates. Hardwoods like oak and walnut are more forgiving, but even they can patch if grain direction varies within a single board.
This isn’t a preparation or application failure — it’s just the wood’s nature. But understanding this means you can compensate before it becomes a problem.
How to Diagnose Your Specific Patchiness Problem
Before you fix anything, identify the pattern. Each pattern points to a different cause.
Light Spots or Streaks
These indicate incomplete stain absorption. Residual dust on the surface, inadequate contact time (you moved too fast), or wood that received uneven surface prep all cause this. Light spots often appear in high spots left by sanding or over oils and finish residue you missed during cleaning.
Test: Run your hand over the unstained wood before you stain. Do you feel texture changes? If yes, prep is uneven.
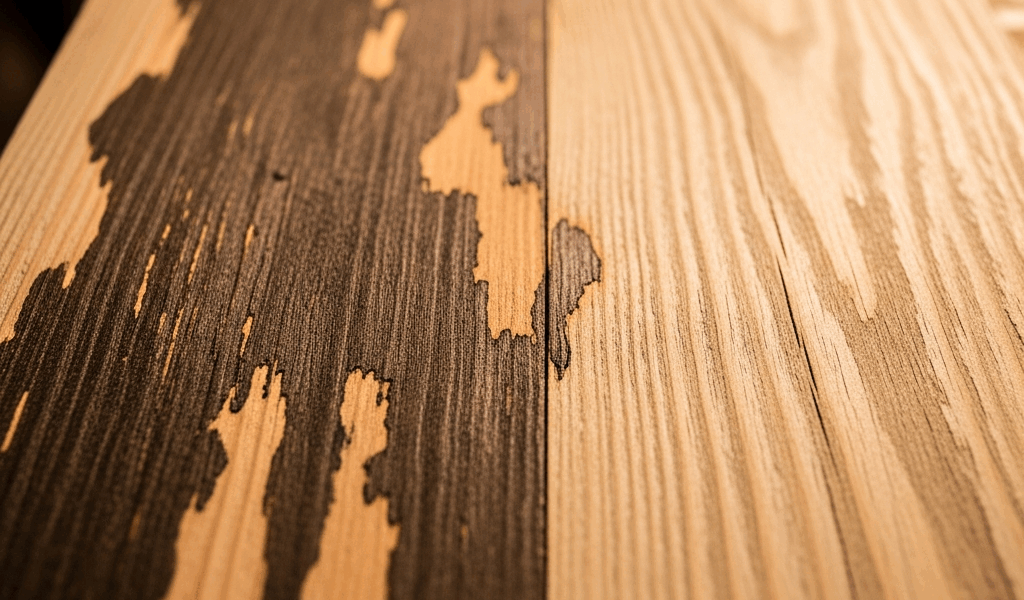
Dark Spots or Heavy Concentration
These mean too much stain settled in one area. The wood grain is softer there and absorbed more, or you left the brush in one spot too long. Softwoods show this constantly because growth rings alternate between dense wood and soft wood. Dense rings resist absorption (light); soft rings drink it (dark).
Test: Do dark spots align with visible wood grain? If yes, it’s species-related. If random, you likely over-applied in those spots.
Striped or Directional Patterns
You applied stain with obvious brush strokes or overlapping edges. This usually means you didn’t maintain a wet edge — each pass dried before you returned to it. Brush marks become permanent.
Test: Do the stripes run along the grain direction? If yes, you applied with the grain but worked too slowly.
Edges Darker Than Center
You worked from the edges inward, and stain pooled where pieces met or where you ended. Classic application-order problem.
Four Ways to Fix Patchy Stain Without Full Resand
Once you’ve identified the pattern, you can often fix it without starting over. Probably should have opened with this section, honestly — most people assume resanding is mandatory.
Targeted Touch-Up With Thinned Stain
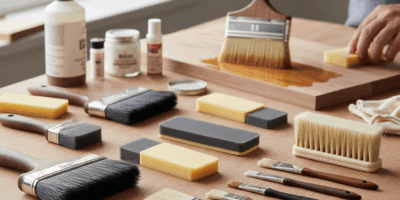
For light spots only: thin your stain with the appropriate solvent. Mineral spirits for oil-based, water for water-based — about 30 percent reduction. Use a small brush or foam applicator to hit only the light areas. The thinner stain flows into pores more easily and lets you add color gradually without going too dark.
Timing matters here. Apply the thin stain within 24 hours of the original coat. If it’s been longer, light sanding with 220-grit in those spots first helps adhesion.
Drying time: follow your stain’s label, but typically 4 to 6 hours before a second coat if needed.
Gel Stain Overlay
Gel stains are forgiving. They sit on top longer, giving you time to blend. Apply gel stain over the entire surface — yes, even the areas that look fine — using very light pressure and long, consistent strokes. The gel fills valleys and sits on peaks more uniformly than liquid stain.
This works best on relatively small projects (shelves, cabinet doors) rather than large surfaces where maintaining a wet edge becomes nearly impossible. Gel stain also dries slower — 8 to 12 hours — which is a benefit here.
Wood Conditioner Plus Targeted Re-stain
If patchiness is severe and you have time, this is surprisingly effective. Apply a wood conditioner (like Minwax Pre-Stain Wood Conditioner, about $8 per quart) to the entire surface. This seals wood slightly and creates a more uniform stain acceptance rate.
Wait 15 minutes. Then apply a fresh coat of stain to the whole piece. You’re essentially giving the wood a second chance to accept stain evenly. The first stain coat doesn’t disappear — you’re layering over it — but the conditioner changes how the new layer behaves.
Ventilation note: conditioner and stain both produce fumes. Crack a window and use a fan.
Chemical Stripper for Isolated Areas
For small patches of heavy stain, you can strip just those spots. Apply a liquid stripper (Citri-Strip or acetone-based, depending on your stain type) to the dark area with a brush. Let it sit per product instructions — usually 20 to 30 minutes. Scrape gently with a plastic scraper, not metal.
This reveals bare wood in that spot. You can then re-stain it to match. The challenge is blending it — the freshly stained spot might not match perfectly if surrounding stain has begun to set. This works best if done within a few hours of the original stain application.
When to just resand instead: if patchiness covers more than 30 percent of the surface, or if the pattern is so uneven that touch-ups would take longer than a full resand, bite the bullet. Some problems have no shortcuts.
How to Prevent Patchy Stain on Your Next Project
Prevention is genuinely easier than repair. I now follow a sequence that’s become automatic.
Sanding sequence: Start with 120-grit, then 150, then finish with 180 or 220. Each pass removes scratches from the previous grit. This takes longer but creates the most uniform surface for stain absorption.
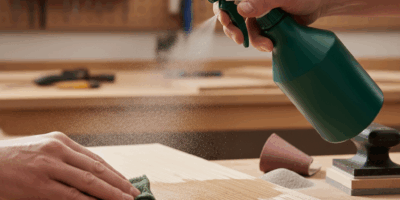
Dust removal ritual: Vacuum, then tack cloth, then damp rag with light pressure to pick up any remaining grit. Wait 20 minutes for wood to dry before staining.
Pre-stain wood conditioner: On softwoods especially, this is not optional. It levels the playing field so soft grain doesn’t absorb stain faster than dense grain. Use full strength on pine, thinned 50/50 on hardwoods.
Stain viscosity check: Before you open a fresh can, shake it — not just stir. Open it and look: does it seem thick? Thin? Consistent? Thick stain means slow application and edge marks. Thin stain means multiple coats and faster drying. Know what you have.
Application technique: Maintain a wet edge. Work in sections small enough that you can cover them in 60 to 90 seconds without the first part drying. Use a foam applicator (more uniform than brushes) or a quality bristle brush. Move with the grain when possible.
Patchy Stain on Different Wood Species
Softwoods patch more aggressively. Pine is the classic offender — growth rings are visible, with soft earlywood and dense latewood absorbing stain at completely different rates. Fir, spruce, and similar species behave the same way.
Hardwoods like walnut, oak, and maple patch less often because grain density is more consistent. That said, oak’s open pores can still trap stain unevenly if you don’t use a conditioner.
The solution for softwoods isn’t complicated: always use pre-stain wood conditioner, thin your stain slightly, and apply slowly. For hardwoods, a conditioner is optional but still smart, especially if the wood feels porous to the touch.
Your next stain project doesn’t have to look patchy. Diagnose first, fix second, and the whole process becomes logical instead of frustrating.
“`

Stay in the loop
Get the latest fine finish wood working updates delivered to your inbox.