Why Polyurethane Stays Sticky Instead of Drying
Polyurethane has evolved with all the conflicting advice flying around. I’ve stood in my garage at 11 PM — more than once — dragging my palm across a finish that felt stickier than it did three hours earlier when I first laid it down. That’s a special kind of frustration. And honestly, the problem isn’t always you. Sticky poly that refuses to cure almost always comes down to one of three things.
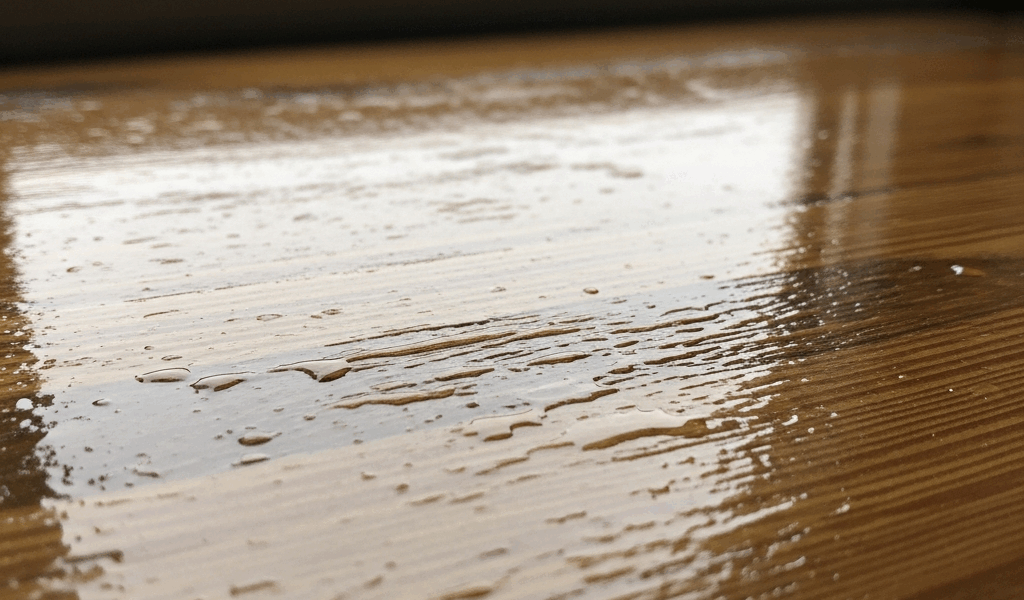
Over-application is the first one. Polyurethane needs air exposure to harden — that’s just how it works. Slap on a thick coat thinking you’ll save yourself a step, and you’ve done the opposite. The outer layer skins over. The stuff underneath stays gummy for days.
Second is surface contamination. This one stings because you can’t see it. Teak oil, Danish oil, furniture polish, silicone-based dust repellent — any of these on the wood beforehand and the polyurethane has nothing to grip. It just sits there like water on a waxed hood. Never really cures.
Third: environment. Below 50°F and above 85% humidity is a perfect storm for a failed cure. Cold, damp basements are basically polyurethane graveyards. The finish needs warmth and dry air. No exceptions.
How to Tell If It Will Fix Itself or Needs Help
Before you grab sandpaper, run a quick touch test. Press one finger lightly on an inconspicuous corner. Tacky but bounces back? You’re probably just impatient. Poly can take a full 72 hours to cure depending on conditions — sometimes longer.
Here’s what I do: I give it 48 hours in a warm, dry room. If it’s noticeably improved but still slightly soft, another 24 hours usually closes it out. Shoot for 65–75°F and 40–60% humidity if you can manage it. A space heater and a dehumidifier go a long way here.
But if your finger leaves a visible dent. If it’s still gummy after three full days. If a fingernail drags through it cleanly — stop waiting. It’s not going to harden on its own. That ship has sailed.
Step-by-Step Fix for Sticky Polyurethane
Quick callout up front. Knowing which fix matches your actual problem saves hours of wasted effort. The repair depends entirely on what caused the stickiness in the first place.
- If it’s a humidity or temperature issue: Get air moving immediately. A basic box fan works — or crack a window if it’s dry outside. Set a space heater nearby if it’s cold; aim for at least 70°F. Most minor tackiness clears up within 12–24 hours once conditions improve.
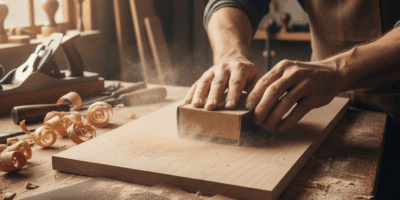
- If a thin first coat is tacky: Light scuffing with 320-grit sandpaper often does the job. Sand gently to dull the surface, wipe away the dust with a tack cloth, then lay down a second thin coat. Gives the finish another shot at hardening. Most pros apply four or five thin coats rather than one heavy one — exactly for this reason.
- If the coat is thick and gummy: Step down to 150-grit and sand back until you hit firm material. You’re cutting through the gummy layer to reach cured poly underneath. It takes patience and a sore shoulder, but it works. Once you’re at solid polyurethane, vacuum everything, wipe with a tack cloth, and apply a fresh thin coat.
- If contamination is the cause: Sanding won’t save you here. If oil got into that wood before you applied the finish, the polyurethane simply cannot cure — period. Full strip and restart is your only move. More on that below.
What to Do If the Whole Finish Is Soft and Won’t Harden
But what is a contamination failure, exactly? In essence, it’s what happens when polyurethane lands on teak oil, paste wax, or furniture polish and has no surface to actually bond with. But it’s much more than a bonding problem — the chemistry gets disrupted and the finish stays permanently soft. You’re not dealing with slow curing. You’re dealing with a finish that physically cannot harden.
Sanding won’t fix this. You could sand for two hours and never reach bare wood — you’d just be smoothing soft poly over a layer of oily residue. The only real solution is complete removal. Skip the misstep I made of spending a weekend sanding before figuring that out.
Strip the finish with mineral spirits or a chemical stripper — Citristrip works well and smells less aggressive than most alternatives, roughly $12–$15 at most hardware stores. Apply per the label, wait the specified time (usually 30 minutes to a few hours), then scrape with a plastic scraper. The oily residue lifts with the finish. Repeat the process if needed.
Once stripped, sand the bare wood with 120-grit to knock down any remaining residue and raised grain. Wipe with a barely damp cloth. Let it dry completely — I mean completely, not just surface dry. Then apply polyurethane on a genuinely clean surface. That’s what makes the difference.
I made this exact mistake on an oak dining table back in 2019. Applied Minwax polyurethane right over a Danish oil finish without realizing they were incompatible. Spent two full days sanding a surface that stayed gummy no matter what I did. Stripping and restarting added a week to the whole project. Don’t do what I did.
How to Prevent Sticky Polyurethane Next Time
So, without further ado, let’s talk prevention — because fixing this is miserable and doing it right the first time costs nothing extra.
- Thin coats only. About one-eighth of an inch is the standard — roughly what you get off the edge of a foam brush. Multiple thin coats harden faster and more completely than one heavy coat every single time.
- Wipe the surface with mineral spirits on a clean rag before you start. Then follow with a tack cloth. Any contamination left behind will show up in your finish later.
- Check conditions first. Below 50°F or above 85% humidity — walk away and wait. No exceptions.
- Follow recoat windows. Most water-based polys need four hours between coats. Oil-based want 4–8 hours minimum. The label isn’t a suggestion.
- Keep air moving. Even a small fan pointed at the surface makes a measurable difference in cure time. A stagnant room slows everything down.
That’s what makes polyurethane endearing to us woodworkers — get the conditions right and it’s one of the most durable finishes you can apply. Get them wrong and it punishes you for days. Diagnosis first, then action. Every time.


Stay in the loop
Get the latest fine finish wood working updates delivered to your inbox.