The Finish That Built Empires
Three centuries ago, European craftsmen developed a finishing technique so refined that pieces made with it still glow today. French polishing built the furniture of palaces, the instruments of virtuosos, and the desks of statesmen. It has no equal in depth, clarity, or luminosity.
The technique uses only two materials: shellac and oil. Applied through a specialized rubbing motion, these simple ingredients create a finish of impossible perfection. No modern spray or brush finish quite matches the visual depth of a hand-rubbed French polish.
Why the Technique Survives
Spray lacquer is faster. Polyurethane is more durable. Yet fine furniture makers and instrument builders still French polish because nothing else looks the same. The finish isn’t just on the wood—it appears to be within the wood, glowing from underneath.
This happens because French polish is built up in hundreds of micro-thin layers. Each layer adds minimal thickness but contributes to overall depth. Light enters the finish, bounces through multiple layers, and returns to your eye carrying warmth and dimension that thick, single-application finishes cannot achieve.
The Materials Required
Shellac: Use fresh, dewaxed shellac. SealCoat or pre-dissolved dewaxed shellac works well for beginners. Advanced practitioners dissolve their own shellac flakes in denatured alcohol. The shellac must be thin—1-pound cut (1 pound of shellac per gallon of alcohol) is standard.
Oil: Traditional French polishers use raw linseed oil, mineral oil, or specialty “French polish oil.” The oil prevents the pad from sticking to previous layers while adding workability. Only tiny amounts are used—drops, not pools.
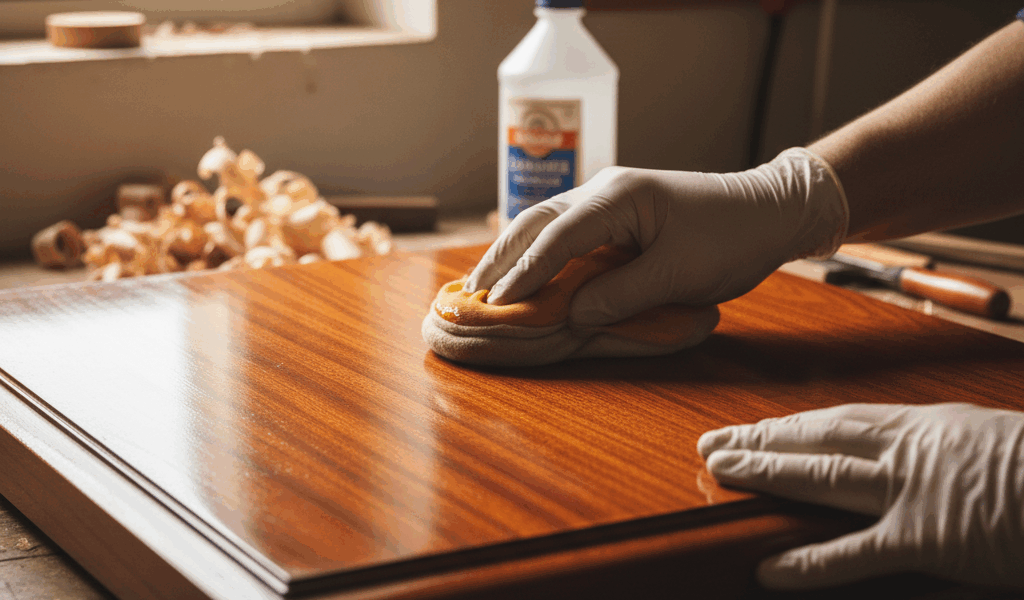
The pad (rubber/muneca): This specialized applicator holds shellac in a reservoir and meters it out during rubbing. Make it by wrapping soft cotton wadding (old t-shirt material works) with a smooth outer layer (lint-free cloth, worn cotton, or cheesecloth folded smooth).
Basic Technique
Preparing the pad: Open the pad and apply a small amount of shellac to the cotton wadding core. Reform the pad, twisting the outer cloth to create a smooth, tight surface. The pad should be damp with shellac but not dripping.
Applying oil: Add one or two drops of oil to the pad’s outer surface. This lubricates the pad’s movement and prevents it from grabbing as you work.
The motion: Never let the pad stop moving on the work surface. Begin off the edge, glide onto the work, and glide off the other edge. Use overlapping figure-eight or circular patterns. Light, even pressure deposits microscopic amounts of shellac with each pass.
Building layers: Continue the motion until the pad begins to drag, indicating it’s running dry. Add more shellac to the core, another drop of oil to the surface, and continue. Multiple sessions over multiple days build the full finish.
The Spiriting Off Stage
After building sufficient layers, the finish surface contains residual oil. This must be removed to achieve the full French polish shine. “Spiriting off” uses a pad charged only with denatured alcohol—no shellac, no oil.
Light, quick passes with the alcohol pad remove the oil haze, leaving pure, clear shellac behind. This final stage transforms good results into spectacular results. The finish should gleam with a depth that seems lit from within.
Common Beginner Mistakes
Too much shellac: The pad should never leave visible wet trails. If you see pooling or thick deposits, you’re applying too much. French polish builds from nearly invisible layers.
Stopping on the surface: A stationary pad can dissolve previous work, creating a blemish. Always keep moving, and always begin and end your strokes off the work edge.
Too much oil: Excess oil creates persistent cloudiness that becomes difficult to remove. One or two drops is sufficient. If the pad moves freely, you have enough oil.
Impatience: French polish develops over days or weeks. Rushing produces thick, uneven results. The technique rewards patience and meditation.
Modern Applications
Full French polish suits guitars, violins, antique restorations, and high-end small furniture. For larger pieces or commercial work, many finishers use “French polish technique” with spray or brush application of the underlying coats, reserving hand-padding for the final layers only.
Learning French polish transforms how you understand finishing. Even if you never use the technique on a full piece, the principles—thin layers, hand-applied with care, built gradually over time—inform better results with every finishing method.
The Continuing Tradition
Master French polishers spend years developing their skill. The technique cannot be fully explained—it must be felt through hours of practice. But beginners can achieve respectable results on their first attempts by starting slow, using thin shellac, and respecting the process.
Three hundred years of refinement produced this technique. Modern chemistry hasn’t replaced it. For depth, warmth, and visual richness, French polish remains the standard against which other finishes are measured.

Stay in the loop
Get the latest fine finish wood working updates delivered to your inbox.