
“`html
Why Large Surfaces Show Stain Unevenly
I spent an entire Saturday staining a six-foot walnut dining table, convinced my technique was solid. Three hours in, I noticed dark streaks running down the grain like some kind of wood disease. That’s when I learned that staining large surfaces isn’t just a scaled-up version of finishing a cutting board—the physics actually changes.
The core problem: wet edge timing. On a small project, you can apply stain to an entire piece while keeping the leading edge wet. On a 48-inch tabletop? By the time you finish one end, the other end has already started setting. Stain is a thin, fast-drying medium — unlike paint, which sits on top with its own built-in leveling properties. Stain penetrates wood fibers and dries as it absorbs. That absorption speed varies across the same board depending on grain density, wood species, and how long the surface has been exposed to air.
Grain variation at scale matters more than most guides admit. A tight-grained maple section absorbs stain slower than adjacent open-grained areas. On a 12-inch board, this barely registers visually. On a 48-inch surface, those variations stack up and become obvious color differences. Probably should have opened with this section, honestly — it’s why generic “apply stain with a brush” advice fails so badly for tabletops and large cabinet doors.
Then there’s temperature and humidity. I’ve watched stain dry in 45 minutes on a 65-degree morning with low humidity, and 3+ hours on a humid afternoon at 72 degrees. Faster drying actually works against you on large surfaces because you lose the window to blend and feather edges.
Prep Work That Actually Matters for Even Stain
This is where most people fail. They sand, they wipe, they think they’re ready. The stain goes down and reveals every uneven spot they rushed through.
Start with wood conditioning if you’re working with softwoods or woods prone to blotching — pine, fir, aspen, and cherry especially. Pre-stain conditioner (PSA) seals wood fibers partially, which sounds counterintuitive until you realize it prevents wild absorption variation across grain. Apply it following manufacturer timing (usually 15 minutes before staining for standard PSA), and let it dry fully. I use Minwax conditioner for most softwood work. It costs about $8 per quart and saves countless frustration hours.
Grain raising happens on large surfaces too, and you need to account for it. Sand to 150-grit minimum for softwoods, 180-grit for hardwoods. After conditioning and before staining, dampen the entire surface with a damp (not wet) cloth to raise grain fibers. Let it dry completely — usually 20-30 minutes. Then sand lightly with 220-grit to knock down those raised fibers. This extra step prevents a rough, blotchy texture that catches light unevenly and makes color look inconsistent.
For hardwoods like oak, walnut, or cherry without conditioning, you can skip PSA and go straight to careful sanding progression. 120-grit, 150-grit, 180-grit minimum. The progression matters — jumping from 100-grit to 180-grit leaves scratches that stain highlights.
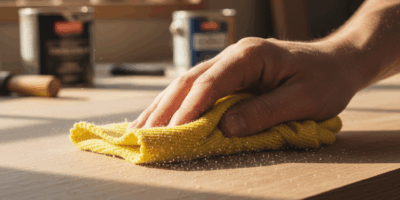
Clean aggressively after sanding. Dust clouds and fine particles embedded in wood grain will absorb stain differently than bare wood. Use a tack cloth after sanding, then let the surface sit for 5 minutes, then tack again. Those few minutes let airborne dust settle.
The Two-Pass Wet-Edge Technique
This is the real secret to even stain on large work. You’re not trying to achieve perfect color on pass one. You’re establishing an even base layer, then deepening and blending on pass two.
First pass: Load your brush or rag with stain — not dripping, but fully saturated. Start at one end of the surface, working along the grain direction. For a tabletop, this means working the length, not the width. Apply in overlapping strokes, maintaining about 2-3 feet of wet edge as you move. On a 4-foot table, you’ll start one end and work steadily without stopping. The goal isn’t perfection — it’s coverage.
Timing between passes is critical. For most stains (Minwax, Varathane, Sherwin-Williams), 4-6 hours minimum in normal conditions (65-75 degrees, moderate humidity). In cold or humid conditions, add 2-3 hours. You want the first coat set enough that a second pass won’t lift the base layer, but still recent enough that it hasn’t fully cured and become inert.
Second pass: This is where the magic happens. The first coat is now dry to the touch but hasn’t fully hardened. Apply your stain the same way — along the grain, maintaining that wet edge. But this time, you’re blending and evening. If you notice a darker spot from the first pass, work around it gently. The second pass fills in any skipped areas and evens out color variation from uneven absorption.
Humidity really impacts this timing. I learned this the hard way on a 90-degree, 70%-humidity August afternoon. My “4-hour” wait turned into 6 hours before the stain was dry enough to recoat. In dry winter conditions, I’ve restained at 3.5 hours. Check the wood — if it feels tacky anywhere, wait longer. A dry surface plus a dry first coat equals even color.
Lap Marks and Color Blotches: Catch and Fix
Lap marks appear where one stain application overlaps another and creates a darker line — usually along the edges where your wet edge started drying. Blotches are irregular dark spots from uneven absorption. They’re different problems with different fixes.
Catch lap marks during application, ideally during the second pass. If you see a dark line forming, feather the edge by overlapping with a very light brush pass — barely any stain, just enough pressure to blend. Don’t scrub or you’ll pull stain off. A single light stroke, following the grain, can erase a forming lap mark.
Blotches are trickier. If you catch them during the wet stage (while stain is still wet), you can wipe them down with a damp cloth to reduce intensity. Wring out the cloth so it’s barely damp — you’re not removing stain, you’re lightening it. One pass, along the grain, then step back and assess.
Some blotches won’t show until the stain dries. Don’t panic. You have two options: light sanding followed by a targeted restain of just that area, or acceptance and a clear topcoat (which can actually reduce the visual impact of minor color variation). For serious blotches, light sand with 220-grit, vacuum, tack cloth, then apply stain to just that section. Blend the edges into the surrounding area by feathering with a dry brush.
Temperature and humidity during drying affect how visible blotches become. Cool, dry conditions let you see problems clearly. Humid conditions actually hide some variation until humidity drops and the wood stabilizes. Check your work under different lighting — blotches that vanish in overhead light might be obvious in sidelight.
Rag vs. Brush vs. Foam for Large Surfaces
Each tool has real trade-offs, and “best” depends on surface type and stain viscosity.
Brushes work well for stain because they carry volume and let you maintain that wet edge efficiently. A 2-3 inch synthetic brush (not natural bristle — stain softens natural bristles) holds enough stain to cover 8-10 feet of work before reloading. The downside: brushes leave bristle marks if you’re not careful, and they’re harder to control on textured surfaces. I use a Purdy 2.5-inch for most tabletop work. They cost $12-15 and last years if you clean them properly.
Rags (lint-free, like cotton t-shirt material) offer excellent control for blending and feathering. They work great for catching and fixing lap marks mid-application because you can wring them out and apply pressure precisely. The problem: they soak stain slower, so you’re reloading constantly on large surfaces. For a 48-inch tabletop, I’ll use a rag for touch-ups but a brush for the main application.
Foam applicators are faster for large flat work and leave fewer visible marks than bristle brushes. The trade-off is durability and feel — foam doesn’t let you sense pressure feedback as well, so blending becomes harder. They work great for cabinet exteriors where you’re doing full coverage without as much finesse.
My actual workflow for a 4-foot by 2-foot tabletop: brush for the first pass (2.5-inch Purdy, full coverage), then lint-free rag for the second pass (more control for evening and blending). That combination handles both speed and precision.
Whatever tool you choose, clean it between passes. Stain dries on bristles and creates clots that deposit uneven color. Soak brushes in mineral spirits, wring thoroughly, and let them air dry bristles-down.
“`


Stay in the loop
Get the latest fine finish wood working updates delivered to your inbox.