What Lap Marks Actually Are and Why They Happen
Wood staining has changed quite a bit thanks to the conflicting advice flying around. But lap marks? Those are straightforward — and straightforwardly awful when you’re standing there looking at racing stripes down the front of a dresser you just spent three hours on.
As someone who ruined a walnut dresser about five years back, I figured out how to handle lap marks the hard way. Today, I will share it all with you.
But what is a lap mark? In essence, it’s a darker, streaky band that appears where you dragged a wet brush across stain that had already started to set. But it’s much more than just an eyesore — it’s a sign that the stain chemistry got interrupted mid-process. Wet stain on top of tacky stain doesn’t blend. It sits slightly proud of the surface, concentrates pigment at the overlap point, and once everything dries, you’ve got a ridge line — sometimes with a texture difference — cutting right across the grain direction you were trying to hide it in.
That’s what makes lap marks so frustrating to us woodworkers. You’re not doing anything dramatically wrong. You’re just working a little too slow.
Check How Bad the Lap Marks Are Before You Do Anything
Quick note before the rest of this. Knowing what you’re dealing with saves an entire wasted afternoon.
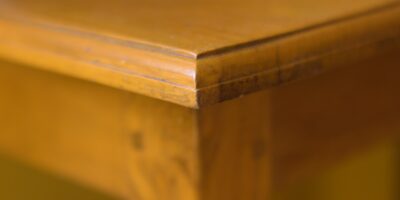
Grab the piece and take it into direct natural light. No natural light available? A work light held at a low angle — raking light, if you want the technical term — will show every flaw on that surface. Run your finger across the lap mark. That one test tells you almost everything.
Light lap marks: You see a darker line but feel nothing. No ridge, no texture shift. The color difference is real but not severe — maybe 20 to 30 percent deeper at the overlap zone. These respond well to sanding.
Heavy lap marks: You can feel the ridge under your fingertip. The color banding is stark — almost like two different stains sitting beside each other. Sometimes there’s actual dried stain buildup along the edge. These need the restaining approach.
Learn from what tripped me up — I spent 90 minutes hand-sanding a heavy lap mark on a pine bookcase before accepting that sanding alone wasn’t going to cut it. The distinction matters before you pick up any sandpaper.
How to Fix Light Lap Marks With Scuff Sanding
Light lap marks are the easier road. So, without further ado, let’s dive in.
Step 1: Wait for full cure. Oil-based stains — your Minwax Classic Stains, your Varathane wood stains — typically need 24 to 48 hours minimum. Water-based stains dry faster, sometimes 4 to 8 hours, but full cure can stretch out nearly a week. Check the actual can label. I’m apparently impatient, and Minwax Gunstock oil stain works for me while early sanding never does. Waited 30 hours on a pine bookcase once, figured that was enough. It wasn’t — the sandpaper clogged within two passes from partially cured stain. Don’t repeat what I did.
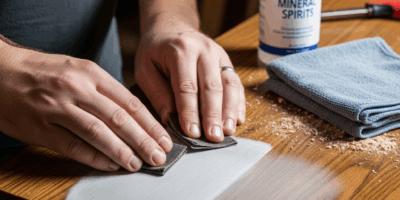
Step 2: Hand-sand with 220-grit, following the grain. Not a random orbital sander. Not a detail sander. Your hand, a quarter sheet of sandpaper, and the grain direction. You’re feathering — softening that hard overlap edge so the color shift becomes gradual. Work the overlap zone lightly, then extend about two inches past it in each direction.
Step 3: Wipe everything clean. Tack cloth first. Then a barely damp cloth. Stain dust off, stain itself still in place.
Step 4: Reassess under raking light. Still visible but softer? You’ve done the job — a slight color whisper at six feet is practically invisible. Still reading as a distinct band? You’re actually dealing with a heavy lap mark. Move to the next section.
The random orbital sander is what gets people in trouble here. It removes material too fast, creates pale spots, and suddenly the repair looks worse than the original problem. Hand-sanding keeps you honest about how much you’re actually taking off.
How to Fix Heavy Lap Marks by Restaining the Panel
Heavy lap marks don’t sand out. The pigment concentration is too severe — sanding deep enough to blend it means going back to bare wood anyway. Might as well do it right from the start.
Step 1: Sand back to bare or near-bare wood. Start with 150-grit, finish with 220. The cleared area needs to extend at least six to eight inches past the visible lap mark in every direction — that breathing room is what lets you feather the new stain so the repair doesn’t read as a patch.
Step 2: Feather the sanded edges by hand with 220-grit. The transition from sanded to unsanded should be gradual. No hard lines. Nobody looking at the finished piece should be able to locate exactly where you stopped working.
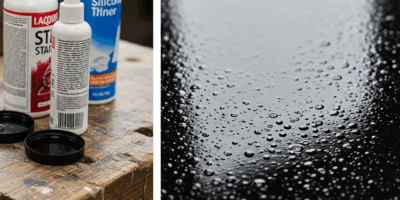
Step 3: Restain using a wet-edge technique. That means moving fast enough that your brush is always landing on wet stain from the previous pass. No pausing mid-panel. Thin, even strokes, then wipe on the manufacturer’s schedule — usually 10 to 15 minutes for oil-based formulas. That timing window isn’t a suggestion.
Gel stain might be the best option here, as difficult wood like pine requires more working time. That is because gel stain sits on the surface longer before penetrating, giving you an extra few minutes to blend into surrounding areas. I used Minwax Gel Stain in Dark Walnut — about $12 a quart at the time — on a pine shelf last year. Nearly perfect color match into the existing stained areas with zero lap marks. Worth the extra cost on problem grain.
Sometimes — and I’ll be honest — the cleanest answer is restaining the entire panel or the whole piece. If the lap mark is on a visible face and you’re already sanding and staining a significant portion of it, finishing the full surface takes maybe 45 extra minutes and guarantees color uniformity. The alternative is spending that same 45 minutes anxious about whether the repair blends perfectly. Full panel wins almost every time.
How to Avoid Lap Marks the Next Time You Stain
Two things cause lap marks: section size and timing. That’s it.
Work bigger sections. Staining one board at a time or one small square at a time is how you create the problem. Work a full cabinet face, a complete bookcase side, the entire top surface — whatever makes sense as a single visual panel. Larger working areas make wet-edge technique natural instead of frantic.
Wipe on the manufacturer’s schedule. If the can says 10 minutes, wipe at 10 minutes. Not 14. Not “when you get to it.” The longer stain sits, the more it firms up — and the faster your next brush stroke creates exactly the lap mark you’re trying to avoid. That timing window on the label exists because someone at the factory tested it. Trust it more than your instincts, at least until you’ve done this enough times that you’ve developed your own reliable read on the material.

Stay in the loop
Get the latest fine finish wood working updates delivered to your inbox.