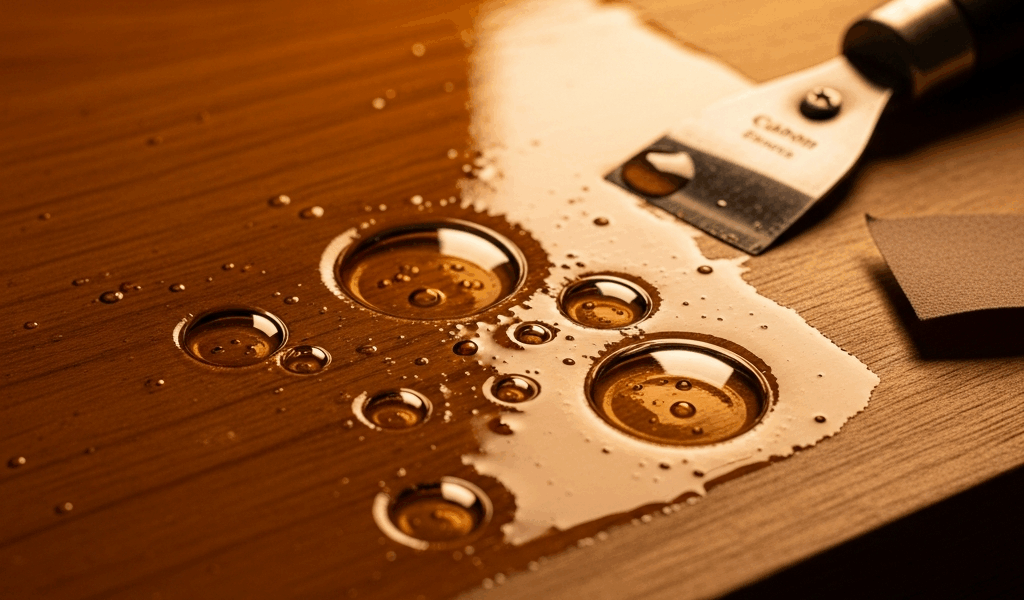
Why Bubbles Form in Polyurethane
Polyurethane finishing has grown more complex with the conflicting advice flying around. I spent a Saturday last spring watching my carefully applied finish bubble up like something was boiling underneath it. Turns out I’d made three separate mistakes — simultaneously — without realizing any of them.
But what causes bubbles in polyurethane? In essence, it’s trapped air. But it’s much more than that. Over-brushing is the most common culprit — drag your brush back over wet finish and you’re literally folding air into the film. Shaking the can instead of stirring introduces thousands of tiny air pockets that don’t escape before the surface skins over. And applying in hot, low-humidity conditions means the solvent flashes off before the air has anywhere to go.
Temperature and humidity matter more than most people realize. Below 50% relative humidity, the finish dries faster than air can escape. Above 85°F, same problem. I learned this the hard way on a June afternoon — I was convinced I was doing everything right, but my shop had hit 78°F with the dehumidifier running and I hadn’t even checked. Classic mistake.
A dirty brush, or one with old dried polyurethane on the ferrule, will seed bubbles too. Those particles act like tiny nucleation points — little magnets for air. Don’t repeat what I did of grabbing whatever brush is nearby.
Did It Dry Yet? How to Tell Which Fix You Need
This is the piece to know up front. So many articles just say “fix your bubbles” without first asking whether you still have time to do it the easy way. That’s the actual fork in the road here.
Your fix depends entirely on cure stage. Press a finger lightly against an inconspicuous area — a corner, the underside of a rail. If it sticks slightly but doesn’t feel wet, you’re in the wet-stage window. That’s roughly 5 to 10 minutes depending on the product and your shop conditions. Oil-based polyurethane stays open longer. Most water-based urethanes tack up fast. Minwax water-based, for example, can be unworkable in under eight minutes on a dry day.
If the surface is hard and doesn’t yield to finger pressure at all, cure has progressed too far. You’ll be sanding. That’s fine — it’s just a different process.
The distinction matters because attempting a wet-stage fix on a cured surface accomplishes nothing. The tack is gone. The solvents have flashed off. Your brush won’t move the bubbles — it’ll just scratch the finish. So, without further ado, let’s dive in.
How to Fix Bubbles While the Finish Is Still Wet
Caught it early? Good. Move fast, but don’t panic.
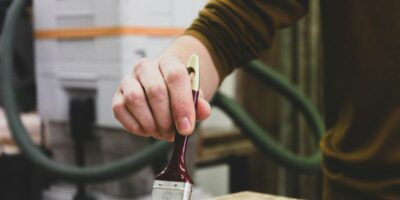
The technique is called tipping off. You use an almost-dry brush — and I mean almost-dry — held at a very shallow angle. Fifteen degrees to the surface, roughly. The bristles should barely graze the finish.
- Dip a quality natural bristle or foam brush lightly into the bubbled area. Maybe an eighth of an inch of bristle wet. No more.
- Hold the brush nearly parallel to the surface. Angle matters here — too steep and you’re re-brushing, which re-traps air all over again.
- Drag lightly with the grain. One direction only. Don’t go back over what you just tipped.
- Move to the next bubble. Leave areas alone after one pass — this is harder than it sounds.
- Stop after 5 to 10 minutes. Once the finish starts setting hard, you’re done. Walking away is genuinely the hardest part of this whole process.
What’s actually happening: the bristles create a flow that moves bubbles toward the edge of the wet film, where they collapse on their own. Surface tension pulls the liquid together and the air escapes. Not magic — physics.
Use a brush you actually trust. I’m apparently a foam brush person and the Wooster 4-inch foam roller for water-based poly works for me while cheap bristle brushes never do. A Purdy XL bristle brush runs $12–15 and is worth every cent for oil-based work. A decent foam brush for water-based is $5–8 at any hardware store. A dollar-store throwaway leaves fibers behind and creates a whole new set of problems.
How to Sand Out Bubbles After Polyurethane Has Cured
Missed the window? You’re sanding. That’s fine — it works.
Wait for true cure first. Dry-to-touch is not cure. Most polyurethanes hit full hardness somewhere between 24 and 48 hours — check your specific can’s label. Sanding too early will clog your paper with gummy finish and smear everything into a worse mess than you started with. That was a $40 sheet of oak. I still think about it.
- Start with 320-grit sandpaper. That’s the sweet spot for flattening bubbles without blowing through to bare wood or primer.
- Sand gently over the bubbled areas in circular motions. You’re not excavating — you’re abrading the surface level with the surrounding finish.
- Stop when the bubbles are flush. You’ll see the sheen change when you’ve done enough. Trust that visual cue.
- Wipe the entire surface with a tack cloth. Every dust particle. Skipping this step means the dust lifts into your new coat and you’re doing this again tomorrow.
- Recoat with fresh polyurethane — applied correctly this time.
Here’s what nobody tells you: sanding fixes the surface. It doesn’t fix the technique that made the bubbles. Shake the can again, apply in dry heat again, over-brush again — and you’ll have bubbles again. Diagnosis first, fix second. Every time.
Shallow bubbles? 220-grit might be enough. Deep ones? Start with 180-grit, then follow up with 320-grit to smooth it back out. Run your fingertips across the surface as you work. You’ll feel when it’s right before you see it.
How to Apply Polyurethane Without Getting Bubbles Again
Prevention is just better workflow. Nothing exotic required.
Stir your polyurethane — don’t shake it. A paint mixer paddle chucked into a cordless drill takes 30 seconds and introduces zero air. If you must shake the can, let it sit for five full minutes before opening. Let the bubbles settle out before they become your problem.
Use a quality brush. Natural bristle for oil-based, foam or synthetic for water-based. Budget $10–20 for something that won’t shed fibers mid-stroke. While you won’t need professional spray equipment, you will need a handful of decent tools — brush, tack cloth, and a stirring attachment at minimum.
Thin the first coat slightly — 5% by volume with the appropriate thinner for your product type. A thinner coat levels better and releases trapped air before the surface skins. That’s what makes this step worth the extra two minutes of prep.
Apply in conditions between 60°F and 75°F, with humidity between 50% and 85%. Your thermostat is as important as your technique — at least if you want the finish to behave the way it’s supposed to.
Work deliberately. Broad, smooth strokes. Minimal re-brushing. One direction per coat. Then walk away and let the chemistry do its job.
Get this right once, and bubble fixes become someone else’s Saturday problem.


Stay in the loop
Get the latest fine finish wood working updates delivered to your inbox.