Why Swirl Marks Show Up After Finishing
Swirl marks have started getting harder to follow with all the conflicting advice flying around woodworking forums. As someone who spent three years chasing this exact problem, I dug into the practical details of what causes them — and how to stop them for good. Today, I will share it all with you.
This article includes affiliate links. We may earn a commission at no extra cost to you.
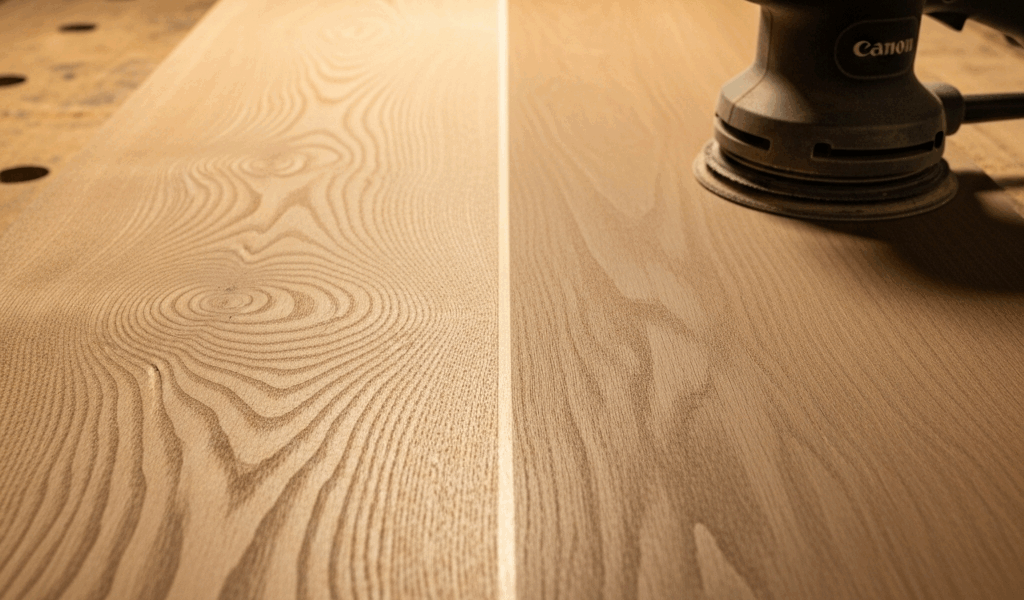
Random-orbit sanders operate by spinning a pad in an eccentric pattern — circles within circles, basically. That hybrid motion is forgiving and fast. It’s also invisible trouble. What it leaves behind is a microscopic circular scratch pattern the naked eye simply cannot detect on dry wood. Tight concentric loops, all running the same direction. Light passes through unevenly. Stain pools differently in those tiny grooves. Polyurethane catches and bounces off them at weird angles.
The swirls seem to appear overnight. You didn’t suddenly get worse at sanding. The surface was always there — waiting for liquid to reveal it.
Most woodworkers assume the problem lives in grit selection or technique. Sometimes it does. But incomplete grit progression is almost always the real culprit. Steps got skipped. The orbital left marks the next grit never fully erased. And the final pass — the one that should have broken that circular pattern entirely — got rushed or abandoned.
The Grit Sequence Most Woodworkers Get Wrong
Quick note before the rest of this. I used to jump straight from 80 grit to 150 thinking I’d save twenty minutes. That gap is too wide. Each grit stage has exactly one job: erase the scratches left by the stage before it. Jump too far and you end up sanding longer — not shorter — because coarser scratches stay buried underneath the finer ones.
For most hardwoods — oak, maple, cherry, walnut — use this sequence:
- 80 grit (removes surface imperfections and mill marks)
- 120 grit (erases 80-grit scratches)
- 150 grit (erases 120-grit scratches)
- 180 grit (erases 150-grit scratches)
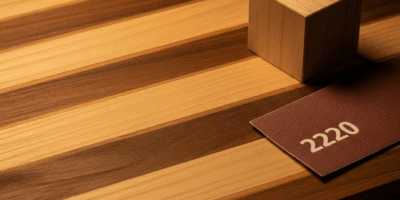
- 220 grit (final stage, but see next section)
Each transition matters differently. At 80 grit, you’re cutting fast — heavy pressure, single direction. At 120, you’re already easing up on the trigger. At 150 and 180, you’re barely pressing down at all. The paper does the work at that point. Let it.
Stop at 220 with the orbital and you’ve made a mistake. The grit has gone as far as it goes, but the orbital’s circular motion is still baked into the surface. The next step isn’t finer paper on the same machine. It’s a different tool entirely.
Softwoods like pine or fir can sometimes get away with stopping at 150 or 180. Hardwoods almost never look right without 220 minimum. Dark stain especially — I’d argue for 220 on everything when you’re going dark. Stain finds every shortcut you took. Don’t repeat what I did.
How to Finish With Hand Sanding to Break the Pattern
Frustrated by orbital swirls on an Osage orange cutting board once, I grabbed a folded piece of 220 and made long, deliberate strokes with the grain. The swirls vanished. That was maybe 2019. I’ve never skipped that step since.
Your final pass should always be by hand. Always. That’s not optional — at least if swirl marks are what brought you here.
Here’s the technique:
- Cut a half-sheet of 220-grit sandpaper in half and fold it in thirds to create a block with multiple fresh surfaces
- Sand only with the grain — no crossgraining
- Use light pressure. Your hand weight only. No pushing
- Make long, continuous strokes the length of the board or panel
- Overlap your strokes by about 50 percent
- Make at least two full passes, rotating the folded paper when one side clogs
This hand pass erases the orbital’s circular signature. Wood fibers all align with grain direction now. Light reflects uniformly. Finish sits on an even surface instead of a microcosmic valley system hidden beneath the surface.
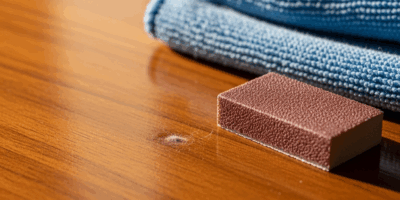
On larger pieces, a sanding block might be the best option, as hand sanding wide panels requires consistent pressure control. That is because your palm naturally creates uneven spots over long strokes. A basic cork or rubber block from any hardware store runs $8–12. Festool makes nicer ones — the Festool RAS 115 sanding block runs around $45 — but honestly the $9 rubber block from the hardware store does the same job on most projects.
This step adds five or ten minutes per project. It’s the five or ten minutes that separate “looks okay” from “looks professional.”
How to Check Your Work Before You Apply Finish
Before stain or poly goes down, catch the problem using the raking light test. It takes ninety seconds. It’s caught more mistakes for me than anything else in my workflow.
Take a shop light, desk lamp, or your phone’s flashlight and hold it at a shallow angle — nearly parallel to the surface. Move it slowly across the wood. Swirl marks light up like a fingerprint under UV. Scratches pop immediately. Uniform surfaces stay dark.
That’s your checkpoint. Swirls show up here, they’ll show up worse under stain. Fix it now — not after the finish is on.
I’m apparently also obsessive about this next trick, and it works for me while skipping it never does: wipe the entire surface with mineral spirits on a lint-free cloth before committing to finish. This approximates exactly how the surface will look wet. The mineral spirits evaporate cleanly, revealing what stain or oil will show. It’s caught more grit-sequence errors than any other step I use.
Both tests cost nothing and take five minutes combined. Use both. Every time.
What to Do If Swirl Marks Are Already Under the Finish
You’ve found this article too late. The finish is on. The swirls are visible. Now what?
If the marks are subtle and the piece isn’t on display — a workbench, the underside of a cabinet, a shop stool — honestly, leave it. Stripping and re-sanding is real labor. Save that energy for visible surfaces where it actually matters.
If the marks are deep or the piece lives somewhere people will see it, you have two paths:
Light scuff between coats: If you haven’t applied the final coat yet, sand between coats with 320 or 400 wet-or-dry sandpaper. Use a sanding block, light pressure, work with the grain. This won’t erase deep swirls already locked under existing finish — but it prevents them from compounding under the next coat. Wipe completely with a tack cloth or damp rag before laying down the next coat.
Strip and re-sand: For pieces where swirls are severe or the finish is already complete, stripping is the only real fix. Chemical stripper is messy and slow. Sanding off finish entirely is very slow. Orbital sanding through finish chews up sandpaper fast — better to hand-sand or use a cabinet scraper down to bare wood. Once you’re back to raw wood, follow the grit sequence and hand-sanding steps from the earlier sections. It’s a full redo, but the result will be right.
On high-value pieces or client work, the strip-and-redo is always worth it. On hobby projects or experimental finishes, weigh whether the lesson learned is worth four hours of labor. That’s a real calculation.
Most of my early swirl-mark mistakes are still under furniture sitting in my garage. I learned from every single one of them and haven’t repeated the same grit-sequence shortcut in years. That education was free — because I lived with the consequences long enough to care about fixing it.


Stay in the loop
Get the latest fine finish wood working updates delivered to your inbox.