French polishing produces the most beautiful finish possible on wood furniture. This traditional technique builds thin layers of shellac to create incomparable depth and clarity. While labor-intensive, the results justify the effort for fine furniture and musical instruments.
This article includes affiliate links. We may earn a commission at no extra cost to you.
The method dates back centuries and remains unsurpassed for visual beauty. Modern alternatives cant match the luminous glow that French polish creates. Understanding both the process and the patience required leads to mastery of this demanding but rewarding skill.
Understanding Shellac and French Polish
Shellac forms the foundation of French polish. This natural resin comes from lac beetles and dissolves in alcohol to create a finish. Its been used for centuries because nothing else produces the same depth and warmth on wood.
French polish refers to both the finish and the application technique. The process involves applying many thin layers of shellac using a pad called a rubber. Each pass adds only microscopic thickness, building up gradually to create remarkable clarity.
Different shellac grades produce different results. Blonde shellac appears lightest and works best on pale woods. Orange shellac adds warmth and deepens color on darker species. Button lac provides rich amber tones. Selecting the right grade matches the wood species.
Cut strength indicates shellac concentration. A two-pound cut means two pounds of shellac dissolved in one gallon of alcohol. French polishing typically uses one to two-pound cuts. Thinner cuts spread easier and build more smoothly.
Denatured alcohol serves as the solvent for shellac. Some French polishers prefer other alcohols for specific characteristics, but denatured alcohol works well for most applications. Fresh alcohol dissolves shellac better than old stock.
Making the Rubber Pad
The rubber pad applies shellac during French polishing. Making a proper rubber requires the right materials and careful construction. A well-made pad distributes finish evenly and lasts through multiple sessions.
Inner core material absorbs and releases shellac slowly. Cotton batting or cheesecloth wadded into an egg-shaped ball works well. The core should be firm but compressible. Some polishers prefer cotton wool for its absorbency.
Outer covering stretches tight over the core without wrinkles. Closely woven cotton works best. Old cotton t-shirts provide excellent covering material. The fabric must be clean with no lint or debris.
Shaping the rubber matters for application. The bottom should be smooth and slightly rounded. Wrinkles or folds in the covering leave marks in the finish. Take time to form the pad properly before starting.
Multiple rubbers for different stages helps workflow. A larger rubber applies initial coats quickly. A smaller rubber works better for final polishing when less material deposits per pass.
Surface Preparation
French polish demands meticulous surface preparation. Any defect shows through the finish because it adds no film thickness to hide problems. The thin layers actually reveal imperfections that thicker finishes might conceal.
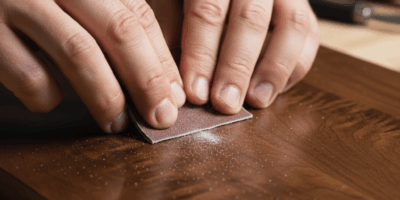
Sanding progresses through grits systematically. Start with whatever grit removes machine marks or damage, typically 120 or 150. Work through 180, 220, 320, and optionally 400. Each grit removes scratches from the previous one.
Sanding direction follows the grain exclusively. Cross-grain scratches become very visible under French polish. Always stroke parallel to wood fibers. Check your work by sidelighting the surface to reveal any remaining scratches.
Raising the grain before polishing improves results. Dampen the surface with a wet cloth, let it dry completely, then sand lightly with fine grit. This prevents water in the shellac from raising fibers during application.
Filling open pores creates the smoothest finish. Oak, mahogany, and other ring-porous woods require grain filler before French polishing. Without filling, the pores remain visible as tiny holes in the finished surface.
The Bodying Stage
Bodying builds the foundation layers of French polish. This stage deposits most of the shellac thickness. Technique during bodying determines whether subsequent stages succeed or struggle.
Loading the rubber correctly starts each pass. Unfold the covering, apply shellac to the core, and refold. The pad should feel damp but not wet. Squeeze gently to distribute the shellac evenly through the fabric.
Application patterns vary among practitioners. Figure-eight patterns work well, as do overlapping circles. Whatever pattern you choose, maintain continuous motion. Stopping on the surface leaves marks and can stick the pad to the finish.
Landing and lifting require specific technique. Approach the surface at an angle like an airplane landing. Glide across while maintaining light pressure. Lift off at the opposite edge at an angle. Never drop the pad straight down or lift straight up.
Pressure stays light throughout bodying. Let the shellac flow from the pad rather than pressing it out. Heavy pressure creates drag marks and removes finish rather than adding it. The weight of your hand provides sufficient pressure.
Oil lubricates the pad during application. A tiny drop of mineral oil or linseed oil reduces friction and prevents sticking. Too much oil clouds the finish, so use sparingly. The oil gets removed in later stages.
Building sessions require patience. Work for 15-30 minutes, then let the surface rest for at least an hour. Multiple sessions over several days build better than marathon efforts. The shellac needs time to harden between sessions.
The Stiffing Stage
Stiffing smooths the bodied surface and removes cloudiness from the lubricating oil. This transitional stage prepares the foundation for final spiriting. The surface should look uniformly smooth but may still appear slightly hazy.
Use a drier rubber during stiffing. Apply less shellac and work longer before reloading. The goal is smoothing rather than building. Light, rapid passes remove high spots while filling low areas.
Reduce oil usage significantly during stiffing. You may not need any additional oil if the surface feels slick enough. Excess oil at this stage becomes harder to remove later and can compromise clarity.
Check progress by sidelighting the surface. Smooth areas reflect light evenly. Any remaining defects catch light differently. Continue stiffing until the entire surface appears uniform.
The Spiriting Stage
Spiriting removes lubricating oil and brings up the final gloss. This stage creates the legendary clarity of French polish. Pure alcohol in the rubber removes oil while burnishing the surface.
Make a fresh rubber for spiriting. Any oil contamination in an old rubber transfers to the surface. The spiriting rubber should be clean and dry before loading with alcohol only.
Light, quick passes characterize spiriting technique. The alcohol flashes off almost immediately. Keep the pad moving constantly. Very light pressure prevents disturbing the finish beneath.
Watch for cloudiness disappearing as oil removes. The surface should become increasingly clear with each pass. If cloudiness returns, you may be applying too much pressure or moving too slowly.
Final passes use almost no pressure. Barely touching the surface burnishes to a brilliant gloss. The pad should glide effortlessly. Slow down only when the surface feels perfectly smooth.

Common Problems and Solutions
Cloudiness indicates oil trapped in or on the finish. Continue spiriting with fresh alcohol until clear. If cloudiness persists, the oil may have penetrated too deeply. Light sanding and rebuilding may be necessary.
Witness marks appear when the pad stops on the surface or lands improperly. Let the surface harden, then lightly sand with fine paper. Rebuild over the sanded area carefully.
Dragging occurs when the pad sticks to tacky finish. Add a tiny drop of oil to lubricate. If dragging persists, the finish may be too fresh. Wait longer between sessions for proper hardening.
Streaky finish suggests uneven pad loading or inconsistent pressure. Maintain steady pressure and reload more frequently. Overlap passes to blend any variations.
Caring for French Polished Surfaces
French polish requires more careful handling than modern finishes. Alcohol dissolves shellac, so avoid contact with alcoholic beverages. Heat causes white marks, so use coasters and trivets.
Regular dusting with soft cloth maintains the surface. Avoid silicone polishes that can contaminate the finish. If polish becomes necessary, use products specifically compatible with shellac.
Minor damage repairs relatively easily. Light scratches can be burnished out with a rubber and alcohol. Deeper damage requires building fresh layers over the affected area.
The effort invested in French polishing rewards with unmatched beauty. No other finish produces the same depth, clarity, and warmth. For fine furniture and instruments, this traditional technique remains the gold standard.


Stay in the loop
Get the latest fine finish wood working updates delivered to your inbox.