Look, I have Ruined More Cutting Boards Than I Would Like to Admit has gotten complicated with all the options and conflicting advice flying around. As someone who has spent years working with wood finishes in my own shop, I learned everything there is to know about this subject. Today, I will share it all with you.
Look, I have Ruined More Cutting Boards Than I Would Like to Admit
Probably should have led with this section, honestly.
So here is the thing about cutting boards – I used to think you just bought one, used it, and tossed it when it got gross. Then I got into woodworking, made my first cutting board from some beautiful walnut, and watched it crack down the middle after three months. That hurt. Really hurt.
Turns out the finish matters way more than I ever gave it credit for. After killing a few more boards (and my pride), I finally figured out what actually works.
Why You Cannot Just Slap Any Finish On There
Your cutting board takes a beating. Knives, water, garlic juice, raw chicken – it is basically a war zone. And unlike that picture frame on your wall, whatever you put on your board is gonna end up in your food eventually. Nobody wants to season their steak with polyurethane, trust me.
The right finish does a few things: keeps water from soaking in (which causes warping and cracking), does not let bacteria set up shop in the wood grain, and will not poison your dinner. Sounds simple enough, but I managed to screw it up multiple times before getting it right.
What Actually Works
Mineral Oil
This is what most people use, and honestly? It works fine. I can grab a bottle at the pharmacy for like six bucks. It is food-safe, does not smell weird, does not change the taste of anything. The wood soaks it right up and looks great.
The catch? You gotta keep reapplying it. I am talking every few weeks if you use the board regularly. Get lazy (which I definitely did) and the board dries out, cracks, and you are back to square one. Ask me how I know.
Beeswax
I started mixing beeswax with mineral oil after my buddy showed me his cutting boards. The difference was obvious – his looked like they belonged in a magazine, mine looked like they had been through a dishwasher. Repeatedly.
The wax adds this protective layer on top and gives the board a nice subtle sheen. You can buy premixed board butter or make your own. I melt the wax, stir in warm mineral oil, and let it cool. Works great and lasts longer between applications.
Tung Oil
Here is where things get interesting. Tung oil actually cures and hardens in the wood, so you do not need to baby the board as much. Once it is fully cured, water just beads up on the surface.
But man, the waiting. We are talking weeks before it is ready to use. And you need multiple coats. I was so impatient with my first tung oil board that I used it too early and ended up having to strip the whole thing and start over. Do not be me.
Also – make sure you get pure tung oil. A lot of products say tung oil on the label but are actually some chemical cocktail. Read the ingredients.
Walnut Oil
Walnut oil smells amazing and gives the wood this deep, rich color that is really nice. It is completely natural, penetrates deep into the grain. I love how it looks.
Two problems though: it takes forever to dry, and if anyone in your house has a nut allergy, you cannot use it. Full stop. I gave a walnut oil board as a gift once and then found out the kid had a tree nut allergy. Felt terrible about that one.
Carnauba Wax
This stuff comes from palm leaves and creates a really hard, glossy surface. I use it mixed with other oils usually. It is tough as nails – resists scratches better than anything else I have tried. A little goes a long way.
How I Actually Apply This Stuff
Here is my process after years of trial and error:
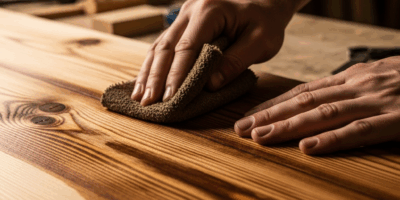
First, the board needs to be bone dry and clean. I give it a light sand with 220-grit – nothing crazy, just enough to open up the pores. Then I wipe off all the dust with a slightly damp cloth and let it dry again.
I apply the oil with an old t-shirt (works better than fancy applicators, honestly). Go with the grain, not against it. I learned that one the hard way – cross-grain application can leave streaks that never quite go away.
Then I let it sit. Overnight is good. Some people say a few hours is fine, but I have had better results with longer soak times. Wipe off whatever did not absorb in the morning.
For a new board, I will do this three or four times before calling it done. Takes a while, but the board will last years instead of months.
Keeping Your Board Alive
Okay, so you have got a nicely finished board. Now do not ruin it.
Never, ever put it in the dishwasher. I do not care what anyone says. The heat and water will destroy it. Hand wash with warm soapy water, dry it immediately, and store it upright so air can get to both sides.
When it starts looking dry or dull, hit it with more oil. I can usually tell because water stops beading up the way it used to. That is your sign.
Once in a while I will rub half a lemon on the surface to kill any lingering smells. Works better than you would think, especially after cutting onions.
Drying vs Non-Drying Oils
This confused me for the longest time, so let me break it down simply:
Drying oils (tung, walnut) actually harden when they are exposed to air. They go through a chemical change and become solid. That means you do not need to reapply as often, but you need patience during the curing process.
Non-drying oils (mineral oil) stay liquid forever. They just sit in the wood. Easy to apply, but they will work their way out over time and need more frequent maintenance.
Neither is better – they are just different. I use mineral oil on boards I want to finish quickly and tung oil on the nice ones I am willing to wait for.
What Can Go Wrong
Let me save you some pain I went through:
Mineral oil will not give you the most durable finish. If you want something that really holds up to daily abuse, you need drying oils or wax combos.
Tung oil applications are a commitment. Miss a coat or rush the process and you will regret it.
The nut allergy thing with walnut oil is serious. Always ask before giving someone a board finished with it.
Some woods drink up oil like crazy. Maple with its tight grain needs less; end-grain boards need way more because of all those exposed fibers.
Matching Finish to Wood Type
Dense hardwoods like maple and walnut can get away with just oil because their tight grain does not let much moisture through anyway. Softer woods or anything with open grain might need the extra protection of a wax layer on top.
End-grain cutting boards are their own thing. All those tiny exposed wood fibers soak up finish like a sponge. Plan on using way more product than you expect.
For fancy decorative boards – the ones with cool patterns or mixed woods – I am more careful about building up thin layers rather than flooding them with oil. Different woods absorb at different rates and you can end up with blotchy spots if you are not paying attention.
Honestly, the best advice I can give is to just start. Grab some mineral oil, pick a cutting board, and go for it. You will learn more from doing than from reading, and cutting boards are pretty forgiving if you mess up. The wood does not hold grudges.
Recommended Woodworking Tools
HURRICANE 4-Piece Wood Chisel Set
CR-V steel beveled edge blades for precision carving.
GREBSTK 4-Piece Wood Chisel Set
Sharp bevel edge bench chisels for woodworking.
As an Amazon Associate, we earn from qualifying purchases.


Stay in the loop
Get the latest fine finish wood working updates delivered to your inbox.