What Blushing Actually Is and Why It Happens
Lacquer blush has gotten complicated with all the conflicting advice flying around. I’ve stared at enough ruined tabletops to know the frustration — that milky, cloudy haze creeping across a finish you spent hours building. The kind that makes you want to throw the spray gun across the shop.
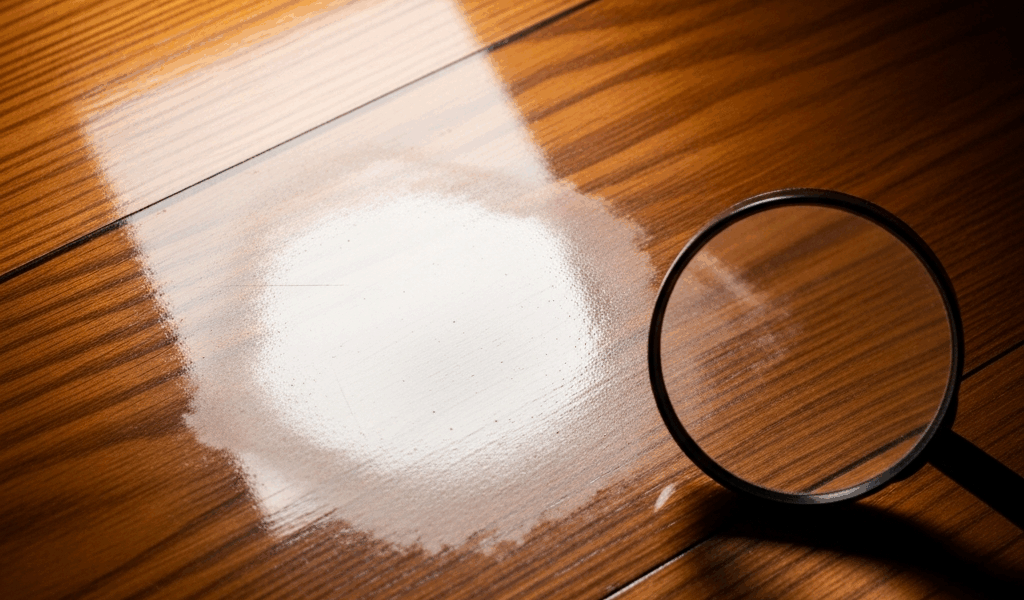
But what is lacquer blush? In essence, it’s moisture trapped inside the lacquer film as it dries, creating tiny pockets of water vapor that scatter light and kill your gloss. But it’s much more than that — it’s actually a symptom of three separate problems colliding at once.
Humidity. Temperature. Solvent flash-off speed. Those are your culprits. Spray lacquer at 75 percent humidity versus 50 percent and the film seals before trapped moisture can escape. Simple as that. Temperature makes it worse — below 65 degrees Fahrenheit, the film hardens slowly, giving moisture more time to get locked in. Then there’s solvent flash-off, which is the quiet one nobody talks about. Hot conditions or fast-evaporating thinner? Your surface film seals while the subsurface layers are still releasing moisture. That moisture stays locked inside. Probably should have opened with this section, honestly — knowing the root cause is what separates a permanent fix from a really expensive mistake.
How to Tell If Your Blush Is Still Fixable
Not all blush is created equal. Fresh blush is fixable. Blush that’s cured solid into the film is a different animal entirely.
Run your fingernail lightly across the affected area within 30 minutes of application. Tackiness? Cloudy haze that smears slightly? You caught it early. This is triage mode — act now and you save the coat. Fresh blush looks like a frost pattern or watermark, opaque in a way it shouldn’t be. If the finish feels hard, doesn’t yield to pressure, and the blush is locked in, simple fixes won’t touch it.
Here’s the hard truth. If the lacquer has cured for more than an hour and the blush is still sitting there, it’s inside the film. Two paths forward. Option one is the solvent blush method — covered below. Option two is accepting you’ll need to sand back and recoat. Neither is fun. But knowing which stage you’re in saves a lot of wasted time.
Fixing Fresh Blush While the Finish Is Still Wet
Speed matters here. You have maybe 15 to 30 minutes, depending on temperature and your specific lacquer.
First — stop spraying. Put the gun down. The worst instinct is to keep coating, thinking you’ll bury the problem. You won’t. You’ll trap more moisture deeper into the film, and then you’ve really got a mess.
Add lacquer retarder to your next batch of material. Not the coat you already sprayed — a fresh batch for the next pass. Retarder slows solvent flash-off, buying trapped moisture enough time to escape before the film hardens. For a standard 2-pound cut of lacquer, I run between 5 and 10 percent retarder by volume. My personal baseline is 7 percent — roughly 3.5 ounces per quart. Go over 15 percent and your dry time stretches so long that dust settles or the film stays tacky overnight. Too little and you’ve accomplished nothing.
Before applying that retarder-loaded coat, slow your spray pattern down. Drop your air pressure by 10 PSI — so if you’re spraying at 25 PSI, drop to 15. Move the gun slower across the surface. The goal is a thin, deliberate coat, not coverage. Let it sit undisturbed for at least two hours before adding another layer. That’s what makes retarder-adjusted technique endearing to us finishing folks — it’s not complicated, just patient.
I learned this the hard way on a cherry credenza back in 2019. Rushed a second coat without retarder after seeing early blush on the first. Ended up stripping the whole job — probably 14 hours of finishing work gone. Don’t make my mistake.
Fixing Blush After the Lacquer Has Dried
So the blush cured into the film. It happens to everyone eventually. The solvent blush technique can sometimes open the film enough to let moisture escape — but it’s risky, and impatient hands will make things worse.
Fill a standard spray bottle with lacquer thinner. Lacquer thinner specifically — not mineral spirits, which won’t do anything useful here. Thin the solvent down to roughly 25 percent by adding 75 percent distilled water. Not a typo. The water softens the lacquer without destroying it. Spray a light mist from about 12 inches away from the blush area. You are not soaking the finish. One or two light passes, then stop.
Wait five minutes and assess. Blush lifting? Repeat the process. Getting worse or going sticky everywhere? Stop immediately — you’ve opened the film too wide and you’re creating fresh problems on top of the original ones. I’m apparently sensitive to lacquer formulations, and Mohawk Nitrocellulose works for me while some waterborne lacquers never respond well to this method at all.
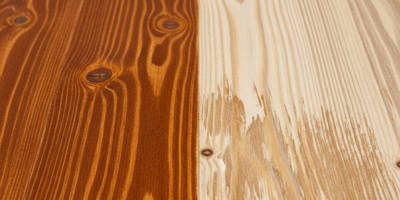
A safer alternative — light sanding between coats. Once the blush-affected coat is fully cured, around 24 hours, take 220-grit sandpaper or a gray ScotchBrite pad and scuff the entire surface. This removes the blush visually and gives the next coat mechanical tooth. It doesn’t solve the underlying moisture issue, but apply the next coat with retarder under proper conditions and you won’t trap new moisture. You’re essentially starting fresh on that layer.
The nuclear option is stripping back to bare wood. Chemical stripper and a scraper, back to zero. Time-consuming — realistically half a day on a medium-sized piece. But a ruined finish left on the workpiece is worse than an afternoon of stripping.
How to Stop Blushing Before It Starts
Prevention is real. Most blush problems are avoidable with the right conditions and about five minutes of planning before you ever pick up the gun. So, without further ado, let’s dive in.
- Keep humidity below 70 percent. A digital hygrometer runs around $12 on Amazon — I clip one directly to my spray booth wall and check it before every single finishing session. Non-negotiable.
- Spray between 65 and 75 degrees Fahrenheit. Cold shops trap moisture inside the film. Hot shops flash solvent faster than moisture can escape. That middle range is the sweet spot.
- Make sure airflow moves away from your work, not across it. Cross-drafts push moisture back into the wet film — which defeats everything else you’re doing right.
- Add retarder proactively during high-humidity months. May through September in most climates. Even if you don’t see blush forming, a 5 to 7 percent retarder dose prevents problems before they start. Think of it as cheap insurance.
- Use a quality spray gun. Cheap guns create uneven atomization, and moisture pools in spots. A DeVilbiss HVLP in the $150 to $300 range eliminates that variable entirely — worth every dollar on a piece you’ve spent real time building.
Blush is frustrating. It’s not mysterious, though. Diagnose the cause, match the fix to the stage you’re in, and move forward. Your next coat will be cleaner.


Stay in the loop
Get the latest fine finish wood working updates delivered to your inbox.