Beyond Factory Perfect
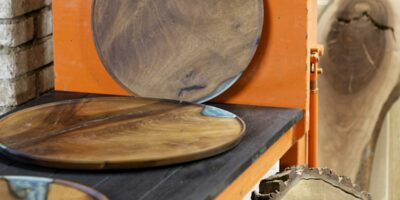
Fresh lacquer straight from the gun looks good. Smooth, even sheen, consistent across the surface. But good isn’t exceptional. The finishes on high-end furniture—those surfaces that seem lit from within, smooth as water—require one more step. Rubbing out.
Rubbing out transforms competent spray work into museum-quality finishing. The process removes micro-imperfections invisible to casual inspection but present to hand and eye. What emerges is a surface so perfect it reflects images without distortion.
Why Factory Finish Falls Short
Even perfect spray application leaves microscopic texture. Orange peel that only shows in raking light. Tiny dust particles that landed during drying. Slightly uneven sheen where spray patterns overlapped. These imperfections are normal and acceptable for most work.
But run your hand across a rubbed-out surface, then touch a fresh spray finish. The difference is unmistakable. Rubbed surfaces feel like glass. Spray surfaces feel like plastic. The visual difference is equally dramatic when examined closely.
The Right Time to Rub Out
Lacquer must cure fully before rubbing out. Freshly sprayed lacquer is too soft—abrasives will leave deep scratches and gum up. For nitrocellulose lacquer, wait at least one week. For catalyzed lacquers, follow manufacturer’s cure time specifications, typically 3-7 days.
Test readiness by pressing a fingernail into an inconspicuous area. If the finish dents, it’s not cured. If the finish resists without deformation, you’re ready to begin.
The Rubbing Out Process
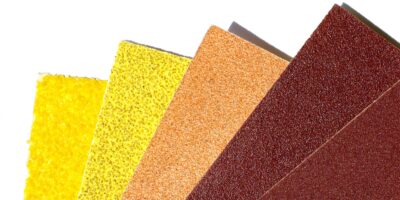
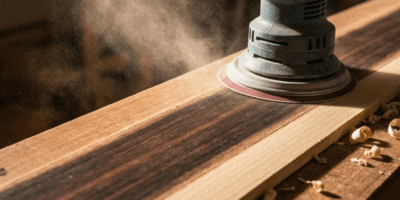
Step 1: Level with wet sanding. Using 1000-grit wet-dry sandpaper with water as lubricant, lightly sand the entire surface. The goal is removing the highest points and any dust nibs without cutting through to the sealer coat. Dip the paper frequently, use light pressure, and work systematically.
After 1000-grit, progress to 1500-grit, then 2000-grit. Each finer grit removes the scratches from the previous grit while further leveling the surface. The finish should look uniformly matte after wet sanding—no glossy spots remaining.
Step 2: Continue to finer grits. Move to 3000-grit, then 4000-grit automotive wet-dry sandpaper. These ultra-fine grits polish more than cut. Work in long strokes with the grain, maintaining even pressure. The surface transforms from matte to satin as scratches become too fine to see.
Step 3: Rubbing compound. After 4000-grit sanding, switch to automotive rubbing compound. Apply a small amount to a foam pad or soft cloth and work in straight lines with moderate pressure. The compound removes the finest scratches, building gloss.
Step 4: Polishing compound. Follow rubbing compound with finer polishing compound. This removes haze left by the rubbing compound, building toward the final mirror shine. Work until no swirl marks or haze remain visible.
Step 5: Paste wax. Final application of quality paste wax protects the polished surface and adds the last degree of luster. Apply thin, buff thoroughly, and admire your work.
The Mirror Test
A truly rubbed-out surface reflects like a mirror. Hold the piece at an angle to a light source. Objects should reflect with crisp edges, not fuzzy distortions. Any haziness indicates more polishing is needed. The reflection shouldn’t shimmer or wave—true flat means sharp reflections.
Choosing Your Sheen
The process above produces high-gloss results. But rubbing out works for any sheen level:
For satin: Stop after 2000-grit wet sanding. The micro-scratches diffuse light, creating even satin sheen without the swirl marks often seen in “satin” spray finishes.
For semi-gloss: Continue through rubbing compound but skip polishing compound and wax. The result falls between satin and high-gloss.
For dead flat: Stop after 1000-grit or even 800-grit. The coarser scratches scatter light completely, eliminating reflection. Buff lightly with 0000 steel wool for consistent texture.
Equipment Worth Having
Automotive suppliers offer wet-dry sandpaper in progressive grits through 5000. Compounds and polishes designed for clear coat automotive finishes work perfectly on lacquer. Random-orbit buffers speed the compound stages but require careful technique to avoid burning through the finish.
For hand work, quality microfiber cloths outperform cotton for polishing. They hold compounds better and leave fewer traces.
The Time Investment
Rubbing out a tabletop takes hours. A set of chairs can take a full day. This isn’t efficient for production work. But for that one piece—the commission that must be perfect, the furniture you’re building for yourself, the restoration that deserves respect—rubbing out delivers results that spray alone cannot achieve.
The technique is straightforward. Patience and attention produce professional results. Once you’ve felt and seen a properly rubbed-out finish, you’ll understand why the effort matters.

Stay in the loop
Get the latest fine finish wood working updates delivered to your inbox.