How to Finish Poplar Wood
Poplar wood is often chosen for its affordability, workability, and fine grain. However, it can present unique challenges when it comes to finishing. Knowing the right techniques and materials can transform poplar into a truly beautiful piece of woodworking.
Understanding Poplar Wood

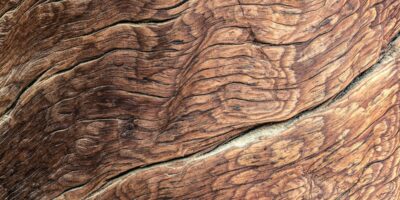
Poplar is a type of hardwood, though softer than oak or maple. It’s a preferred choice for furniture, cabinets, and trim because it’s easy to shape and machine. The natural color of poplar ranges from creamy white to yellow-brown, often with green or purple streaks. Despite its natural beauty, poplar tends to absorb stains unevenly, so care needs to be taken when applying finishes.
Preparing the Surface
Sanding is crucial before applying any stain or finish. Begin with a medium grit sandpaper, around 120 grit, to level the surface. Follow with a finer grit, such as 220, to smooth the wood. Ensure every area is evenly sanded to avoid blotches. After sanding, remove all dust with a vacuum and tack cloth. The cleaner the surface, the better the finish will adhere.
Dealing with Blotchiness

Poplar is notorious for blotching when stained. Pre-stain wood conditioners are an effective solution. These conditioners penetrate the wood and help the stain absorb evenly. Apply the wood conditioner liberally with a brush or cloth, following the grain of the wood. Let it penetrate the surface for about 15 minutes. Wipe off any excess with a clean cloth. Then, proceed to stain once the conditioner has thoroughly dried, usually within 2 hours. Always check the manufacturer’s instructions for specific timing.
Choosing the Right Stain
For poplar, gel stains can be particularly effective. They sit on the surface rather than soaking in deeply, reducing the risk of blotching. Oil-based stains are another option, applied with a brush or rag. Always test the stain on a scrap piece of poplar before committing to your project. This ensures you’re happy with the color and finish. Apply the stain in even strokes along the grain. Allow the stain to sit for 5 to 15 minutes, then wipe off the excess with a clean cloth. The longer it sits, the deeper the color. However, timing will also depend on the manufacturer’s recommendations.
Sealing the Wood

Once you’re satisfied with the stain, sealing is next. A clear finish protects the wood and enhances its visual appeal. Polyurethane is a popular choice for sealing poplar, providing durability and a range of finishes from satin to gloss. Apply a thin, even coat with a brush, again following the grain. Let each coat dry thoroughly, and sand lightly with fine sandpaper between coats for a smooth finish. Two to three coats are usually sufficient.
Alternative Finishes
- Paint: Poplar takes well to paint. Priming is recommended if you choose this route. A semi-gloss or gloss paint will highlight the smooth surface.
- Varnish: Offers a classic look that’s both protective and aesthetically pleasing.
- Wax: Provides a subtle sheen and is easy to apply but isn’t as durable as other finishes.
Caring for Finished Poplar
After finishing, proper care will ensure the longevity of your poplar wood piece. Avoid excessive moisture and direct sunlight, as these can damage the finish over time. Routine dusting with a soft cloth will keep your wood looking fresh. For more ingrained dirt, a slightly damp cloth followed by drying immediately can be effective.
Recommended Woodworking Tools
HURRICANE 4-Piece Wood Chisel Set – $13.99
CR-V steel beveled edge blades for precision carving.
GREBSTK 4-Piece Wood Chisel Set – $13.98
Sharp bevel edge bench chisels for woodworking.
As an Amazon Associate, we earn from qualifying purchases.


Subscribe for Updates
Get the latest articles delivered to your inbox.
We respect your privacy. Unsubscribe anytime.