What Fisheye Actually Is and Why It Happens
Lacquer finishing has turned into a moving target with all the conflicting advice flying around. As someone who has been finishing wood for going on fifteen years now, I spent real time learning the ins and outs of fisheye the hard way — on real projects, with real deadlines, and occasionally with real clients waiting. Today, I will share it all with you.
But what is fisheye? In essence, it’s lacquer actively rejecting a contaminated spot on the surface. But it’s much more than that. It’s not a coating failure in the traditional sense — it’s a chemistry problem playing out in real time, right in front of you.
When wet lacquer hits a contaminated zone, it pulls away like water beading on a freshly waxed hood. Craters form. Small rings appear where a smooth film should be. Then the crater pushes outward — and if you don’t catch it fast, you’re watching that thing eat across an entire panel in under a minute.
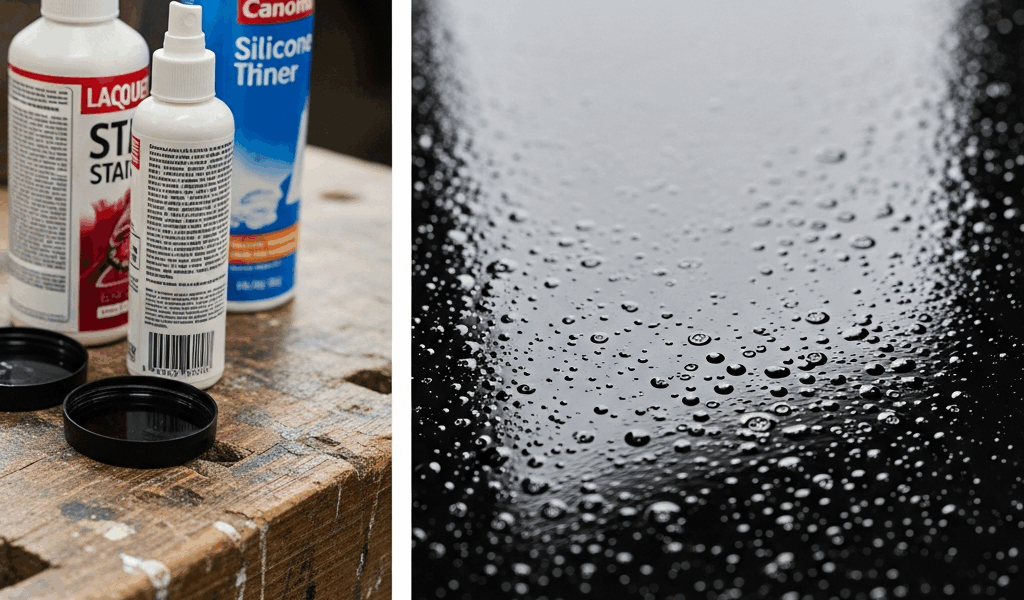
Three culprits show up constantly. Silicone contamination from furniture polish, spray lubricants, or hair and skin conditioners creates microscopic slick patches that lacquer simply cannot wet. Oil and wax residue behave identically. Then there’s the third one — compressor moisture or oil vapor coming up the air line, which is why fisheye sometimes appears mid-run on a surface you’d swear was perfectly clean.
How to Tell Which Problem You Actually Have
Worth mentioning before anything else. Most finishing advice skips diagnosis entirely and jumps straight to “add fisheye eliminator.” That’s backwards. Know the cause before you touch anything.
Here’s how to read what you’re looking at:
- Random scattered craters across the panel. Almost always silicone. It came from handling — your hands, the bench surface, a nearby project someone hit with spray wax last Tuesday. Polish from the last furniture job, linseed oil from a conditioner, a can of WD-40 someone left uncapped two feet away. Any of those will do it.
- Fisheye concentrated at edges, corners, or seams. This points to wax or oil residue trapped in joints or sitting in low spots. You’ll notice a clear pattern — not random scatter. That distinction matters.
- Fisheye that starts mid-spray, running in a line across the panel. Your compressor is the culprit. The moisture trap is full, or oil vapor is riding up the line. This one’s actually easier to resolve than it sounds — you’ve already found the source.
Still uncertain? Run a quick water test on bare wood you haven’t sprayed yet. A little distilled water on the surface tells you plenty. Tight beading means silicone or wax is present. Normal spreading and absorption means your contamination is airborne or coming from the compressor — not the wood itself.
How to Fix Fisheye That Is Still Wet
Stop spraying. Now.
Let the wet lacquer flash for two to three minutes. Don’t touch it. Don’t spray anything else over it. Use that time to actually look at what you have — count the craters, check their size, figure out whether you’re dealing with three tiny spots or a panel that’s basically gone.
Here’s the move most people get wrong: do not spray another coat of lacquer over active fisheye. I learned this on a 4×8 veneer panel for a client back in 2019. I figured another coat would smooth things out. It didn’t. The fisheye multiplied. The whole surface turned into a crater field, and I ended up scrapping the panel entirely and starting over from raw wood. Don’t do what I did.
If the damage is minor — two or three small craters somewhere inconspicuous — you have options. A few drops of fisheye eliminator added to your next batch of lacquer can help you spray lightly over the affected zone. The eliminator is a silicone-based additive — yes, silicone, which feels counterintuitive — that reduces surface tension and coaxes the lacquer into contaminated spots. What matters, though, is that you’ve identified the source first. Without that step, fisheye eliminator is just a band-aid over a problem that will come right back.
Widespread fisheye, or anything in a visible location? Stop entirely. Let the panel dry fully, then scuff with 320-grit before you decide whether to recoat or strip and start fresh. Spraying over wet fisheye doesn’t fix it — it chases it across the whole surface.
How to Fix Fisheye After the Lacquer Has Dried
Once everything is fully cured, the process is actually pretty straightforward.
Step one: scuff sand the affected area. 320 or 400-grit paper, just the craters and maybe a 2-inch buffer zone around them. You’re not leveling the whole panel — you’re giving fresh lacquer something to grip. Light pressure. Sand too hard and you’ll dull the surrounding finish, which creates a whole new problem.
Step two: identify the contamination source. This happens before anything else gets sprayed. Work through the diagnosis. Have you handled the wood bare-handed since the last coat? Any polish or conditioner used anywhere nearby? When did you last drain the compressor moisture trap?
Step three: eliminate that source. Wipe the entire sanded panel with naphtha on a lint-free cloth — not paper towels, which leave fibers behind. I’m apparently a microfiber person, and old cotton T-shirts work for me while shop towels never quite do the job. If silicone is the problem, one pass with naphtha usually isn’t enough. Wipe twice. Suspect the compressor? Drain the tank and the moisture trap before you even pick up the spray gun.
Step four: recoat. Spray the touch-up. You can add fisheye eliminator to this batch — no more than 10 to 15 drops per quart of lacquer. Overuse causes adhesion problems and can leave the finish feeling tacky weeks after it should be dry and hard. One application is usually all you need.
How to Prevent Fisheye From Coming Back
Fixing fisheye is a useful skill. Not getting it in the first place is better.
Silicone products need to be banned from your finishing area entirely. Furniture polish, spray lubricants, conditioners, anything with silicone in the formula — none of it belongs near a lacquer job. I keep a completely separate workbench for assembly and hardware, and finishing happens in a different zone with its own dedicated tools. That separation has saved me more times than I can count.
Wipe every surface — the wood, the bench, the spray gun — with naphtha before you shoot. Five minutes of prep eliminates most surface contamination before it ever becomes a problem.
Drain your compressor tank and moisture trap before every spraying session. I use a Bostitch 3-gallon model — ran me about $230 — and draining it takes under a minute. Every morning before I spray, I open the drain cock and let accumulated water and oil run into a small catch bucket sitting underneath. No shortcuts on this one. Ever.
Skin oils matter too. Handle freshly sanded wood only with gloves if you’re about to spray lacquer. I’ve triggered minor fisheye from nothing but finger marks on bare mahogany — just reaching across the panel to reposition it.
Once you understand the source, fisheye stops being mysterious. It’s just a signal — something is contaminated. That’s all it is. Find the contamination, eliminate it, and the fisheye doesn’t come back.


Stay in the loop
Get the latest fine finish wood working updates delivered to your inbox.