Why Gel Stain Goes Wrong in the First Place
Gel staining has grown more complex with the conflicting advice flying around. As someone who ruined a perfectly good walnut dresser on a Saturday afternoon, I spent real time learning the ins and outs of applying gel stain without streaks or blotches. Today, I will share it all with you.
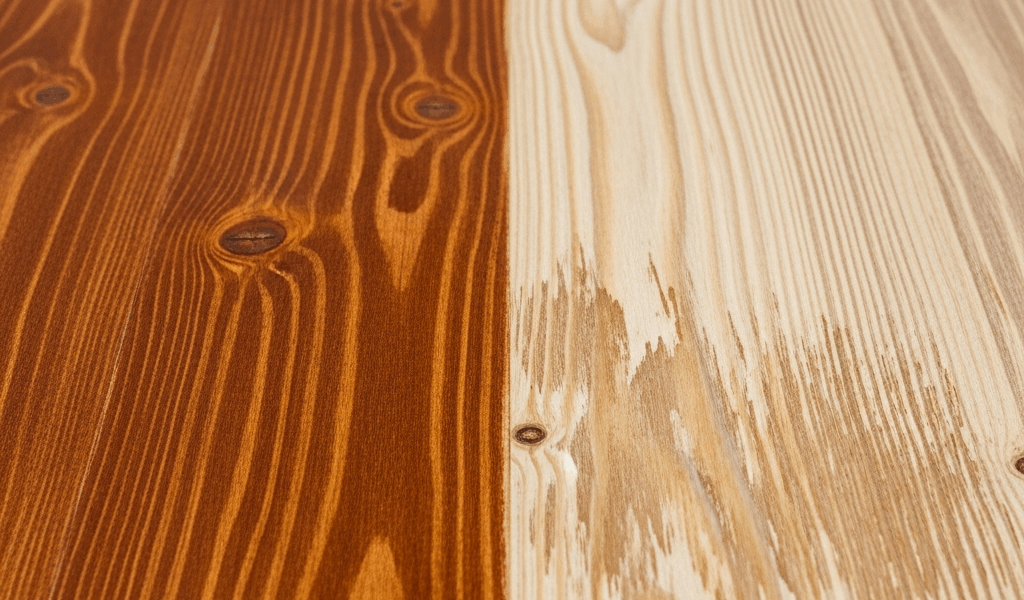
But what is gel stain, really? In essence, it’s a thicker, syrupy version of wood stain that sits on the surface rather than soaking in. But it’s much more than that. Unlike thin liquid stains — which sink into wood fibers at a fairly predictable rate — gel stain behaves more like a tinted glaze. You get better color control, more even tones across soft woods, and genuinely beautiful results. That’s what makes gel stain endearing to us woodworkers. The thickness is the whole point.
It’s also exactly why beginners end up with pools of dark pigment, lap marks where passes overlap, and streaks that catch the light like they’re personally insulting you. The surface texture plays a massive role here. Sand too fine — say, 320-grit — and the wood turns glassy, giving the gel stain nothing to grip. Leave dust behind and you’ve created tiny dams that cause uneven pooling. Skip grain-raising on pine or soft maple and watch the wood fibers swell under the moisture. Blotchy mess. Every time.
The Prep Work That Actually Prevents Problems
Worth mentioning before anything else. Ninety percent of gel stain disasters are prep failures, not application failures.
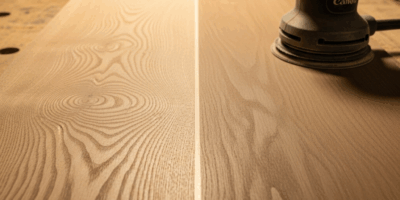
Sand to 180-grit and stop there. Not 220. Definitely not 320. You want smooth-to-the-touch but with enough tooth for the stain to actually grab something. I’m apparently a random orbital sander person — a Ridgid 5-inch with 180-grit Diablo discs works for me while hand-sanding alone never gets me consistent results. Final pass always goes with the grain. Budget around 10 to 15 minutes per dresser drawer depending on size.
On soft woods — pine, poplar, soft maple — raise the grain first. Wet the surface with distilled water, let it dry completely — two to three hours minimum — then sand lightly with 180-grit. Here’s why this matters: gel stain contains water. Wood fibers swell when they get wet. If those fibers haven’t already swollen and been sanded back down before you apply stain, they’ll swell during staining and create that rough, blotchy look everyone hates. Do it once beforehand. Done.
Hardwoods — oak, walnut, cherry — skip the grain-raising. The denser structure doesn’t react as aggressively. Don’t do what I did of treating every wood species the same way.
Pre-conditioner might be the best option for pine, as soft wood requires something to even out absorption. That is because the open grain on pine drinks stain unevenly no matter how careful you are. But on hardwoods with tight grain, I skip it entirely — conditioner seals the surface slightly, and then the gel stain floats on top rather than bonding properly. On soft maple or pine, a thin coat works, but even then it’s optional if you’ve already raised the grain.
Wipe everything down with a tack cloth before you touch a brush. One minute of work. Eliminates dust-caused blotches. Then wait — if the wood surface is cooler than the surrounding air, condensation forms. I wait 30 minutes minimum after tacking, especially in a garage in fall or early spring.
How to Apply Gel Stain Without Creating Lap Marks
Work in small sections. One drawer face. One tabletop panel. One frame rail. Not the entire dresser at once — that’s how lap marks happen.
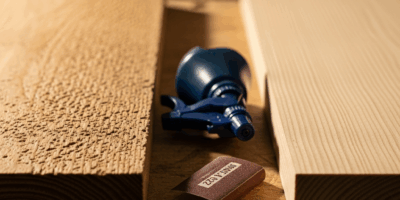
While you won’t need professional spray equipment, you will need a handful of foam brushes and lint-free rags. Natural bristle brushes hold too much product and deposit it unevenly. I buy foam brushes in bulk from the hardware store — usually around $1.50 each at Home Depot, the Wooster 2-inch ones. A folded piece of an old cotton t-shirt works just as well for wiping.
Load the brush, press to the wood, and pull in long strokes following the grain direction. That’s it. No scrubbing. One or two passes per section and then leave it alone. Every extra stroke you add increases the risk of a lap mark.
Keep a wet edge — meaning you move to the next section before the previous one starts to firm up. On a vertical cabinet side, gel stain starts setting in three to five minutes depending on conditions. I’m apparently someone who works in a cold garage in October, so I get eight to ten minutes per section. In July at 85°F? You’re looking at two to three minutes. Know your environment before you start.
First, you should wipe off on schedule — at least if you want consistent color across the whole piece. Apply the stain, wait two to three minutes, then wipe the entire section with a clean lint-free rag going with the grain. People assume leaving gel stain longer makes it darker everywhere. It doesn’t. It gets darker in some spots and pools in others. Color depth comes from how much product you leave on the wood, not how long you leave it sitting there. Wipe consistently. Control the darkness.
How to Fix Streaks and Dark Spots After They Happen
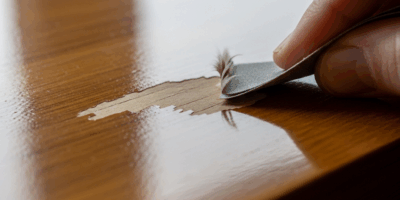
Catch it wet and you can usually save it. Wet stain looks glossy, moveable. If you spot a streak within five minutes of applying — grab a clean rag, dampen it lightly with mineral spirits, and feather it across the problem area. This dilutes the excess and blends it out before it sets. Works most of the time.
Dried stain is a different situation. You’ll know it’s dry because the surface goes matte. At that point, you have two options. Sand the area lightly with 320-grit and apply a second coat of gel stain over the entire section — the second coat blurs the boundary between blotchy and clean areas and usually rescues the project. Or strip the section entirely and start over.
Frustrated by stubborn dried-on gel stain, I eventually started using Citristrip — roughly $12 for a 32-ounce container at most hardware stores — applied generously, left to dwell, then scraped off with a plastic scraper. That was a two-hour job per section. Not fun. But sometimes it’s the only real fix.
Dark spots from dust contamination or uneven pressure are often beyond saving without stripping. This is exactly why prep and technique matter more than any recovery trick I could give you. So, without further ado — do the prep work.
Topcoat Compatibility and What to Apply Over Gel Stain
Here’s a serious gotcha that nobody mentions clearly enough: water-based polyurethane doesn’t bond well to gel stain applied too soon. Gel stain is oil-based. Water-based poly applied before the stain has fully cured can lift, wrinkle, and peel right off the surface. 24 hours is the minimum cure time. 48 hours is safer. I go 48 every time now.
Minwax Wipe-On Poly — the oil-based version, not the water-based — is probably the best option here, as gel stain requires a compatible topcoat to bond correctly. That is because oil plays well with oil. Three thin coats, 24 hours between each coat. Done. Alternatively, one coat of dewaxed shellac — Zinsser SealCoat works, around $20 a quart — acts as a barrier and lets you apply water-based poly on top if you prefer that final look.
Never apply water-based topcoat less than 48 hours after gel staining. I’m apparently stubborn enough to have learned this twice. Skip the misstep I made.
The sequence that works — every single time: sand to 180-grit, raise the grain on soft woods, apply gel stain in small sections, wipe off on schedule, wait 48 hours, apply topcoat. I’ve run this process dozens of times now without a failure. That’s the whole thing.

Stay in the loop
Get the latest fine finish wood working updates delivered to your inbox.